Scroll through this document to see a description of all the great new features released in the latest versions of
Xara Web Designer+
NOTE: These Release Notes refer to Xara Web Designer+, the subscription version of Web Designer, available direct
from Xara (see July 2022, V22 below).
If you have an active subscription to Xara Web Designer+ then these updates are free and they will be downloaded
automatically. And if you are an owner of an older version purchased from Magix, then check out our current offers
on upgrades. If you haven’t tried Web Designer+ yet, why not download the trial.
Other Useful Pages
Our Web Designer+ User Guide and Knowledgebase
You can find Release Notes for the earlier v18 here.
Page 1
Last updated February 25, 2025


Contents
Version 19.0 (March 2022)
Web Improvements
Self-hosting of Google Fonts
Google Fonts are immensely popular with web designers, providing a huge library of quality fonts with good cross browser support, which is why we provide seamless support in Web Designer. However a recent court decision in Germany has cast doubt on whether calling fonts from Google is compatible with GDPR (because it passes the IP address to Google). Xara has reacted quickly with this new release of Web Designer, which offers instant compliance by automatically publishing any Google Fonts to your web space, and no longer referencing Google. All you need to do is republish your website. Xara’s automatic self-hosting makes an otherwise complex workflow simple, but there could be performance and SEO benefits too. In the past, it was considered better to link to Google Fonts and not self-host fonts because of browser limitations. But with modern browsers, that is changing. Now self- hosting fonts can improve page speed and Web Vitals score, with all the SEO and page rank benefits that implies.Use Photo Filename
Many customers have asked why the photos in their published website don’t use the original filenames of the photos that they imported, so that Search Engines can find and index those names. That’s because it’s not always helpful to expose those names in your public website - some filenames may be inappropriate and others may having nothing at all to do with subject of the site and so could be worse for SEO rather than better. Also of course most photos from digital cameras have meaningless names anyway. Therefore users can control what names are used for image files in the published website or web document. The Utilities > Web Properties > Image tab lets you set any name for the selected photo and that name will then be used for the photo’s filename. And since sometimes the photo’s original filename is useful there is now an additional Use photo filename button that will instantly fill that name field for you with the selected photo’s original filename (if it has one). Only use this if the photo filename is meaningful and relevant to the content of your site.
Page 4
Last updated February 25, 2025
Filename set on selected photo, for use in web export
Canonical Links
A canonical tag is a way of telling search engines which specific URL to treat as the master copy of a page, thereby preventing SEO problems caused by identical or "duplicate" content appearing on multiple URLs. Publishing a web page to your domain might mean the same page is served when visiting the web page address with or without the www prefix and on both HTTP and HTTPS protocols. This can appear as duplicate content to search engines. Applying a canonical link will suggest which URL to show in search results and allow search engines to count links pointing at different versions as links to the canonical version. A <link rel=canonical> is now automatically applied to the <head> of your web page when you publish to Xara Hosting / MAGIX Online World. If you are publishing to Other Web Host, enter the URL you want set as canonical in the Website URL field. links with target="_blank" A link that is set to open in a New window or tab (_blank) will now automatically have the ‘noopener’ and ‘noreferrer’ attributes applied. This is a security improvement to prevent the targeted page from gaining access to the referring page.
Page 5
Last updated February 25, 2025
Other Web improvements
• Alt text added to web document viewer buttons • Minor improvement to positioning of videos on popup layerText Improvements
New Google Fonts
We’ve added 21 new Google fonts offering new and interesting typography options.Other Text Improvements
• Spell checker: Each SmartField is now treated as a separate word. • Fixed an issue with some font type icons missing in the menu, on HiDPI displays. • And other minor enhancements.Import/Export
As with every Web Designer release we continue to improve on our industry-leading file format support: • Improvements to PowerPoint, Word and PDF import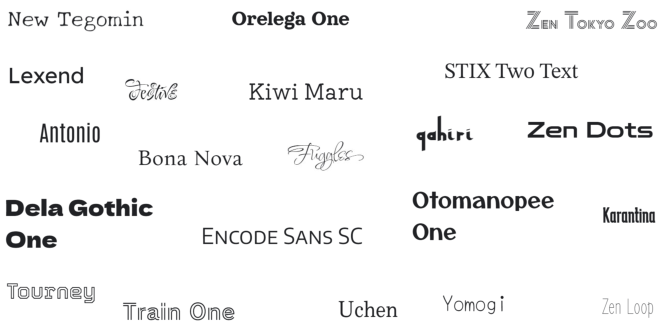
Page 6
Last updated February 25, 2025
•
Enhancements in PDF to Word export
•
Fixed reported issues with import of AI files in the stock illustration folder of the Online Content
Catalog.
Final Notes
We’ve also implemented a large number of minor enhancements including improvements and fixes in the Open Graph dialog, the button palette and Shapes.Version 22.0 (July 2022)
A New Subscription Option From Xara
We’re happy to introduce a brand new subscription option called Xara Web Designer+. It offers all the advantages of a subscription model, namely frequent delivery of new features and content, as they are developed, and the fastest possible response to new compatibility issues and bug reports. You can always be sure you’ll have the latest version. What’s more Web Designer+ comes with direct support from Xara, via chat.New Look User Interface
Xara Web Designer+ has a new, clean, modern appearance.
Page 7
Last updated February 25, 2025
Page 8
Last updated February 25, 2025
Key highlights:
•
The new darker background puts more focus on your design, with less user interface distractions
•
There are new, clearer icon designs throughout.
•
All icons and mouse pointers are now High DPI, so they look sharp and clear on high resolution
displays
•
And other minor tweaks and improvements - for example in the Page & Layer Gallery, the Page
names are now separated from the page thumbnails, so both are clearly visible.

Page 9
Last updated February 25, 2025
Online Help
Web Designer+ help is now online. The various Help buttons throughout the application now open your default web browser onto the online help system, where you can browse and search the help, just as you could with the locally installed help in earlier versions. Having the help online allows Xara to update it more frequently without having to release application updates, and to integrate it with the online knowledgebase articles.Shapes as SVG (Scalable Vector Graphics)
Modern web browsers have great SVG support, which means we can now export many more types of graphical object to web using SVG, instead of having to make separate bitmap image files for each one. As a result your website and web documents load faster - with all the usability and SEO benefits that brings - because there are fewer bitmap images to download. What’s more, your content also looks sharper as SVG. All you need to do is turn on the new Shapes as SVG option at the bottom of the Utilities > Web Properties > Website tab. Then Xara will automatically use SVG for as many objects as it can when exporting your document for the web. New documents you create will now have this option on by default. Flat fills, linear graduated fills and circular graduated fills, all now export as SVG and we are now adding the object types listed below. Which means it’s now possible to build graphically rich web documents and websites that have no images to download at all! Given the importance of page loading time to page rank, this is a valuable improvement for your SEO efforts. Wall Shadows as SVG Wall Shadows created with the Shadow Tool will now export as SVG instead of as images. Wall shadow is by far the most commonly used type of shadow. Floor shadows and Glow shadows will continue to export as images, due to a lack of direct support for these shadow types in SVG. Elliptical Fills as SVG Elliptical fills are now also exported as SVG, in addition to Flat, Linear and Circular fills which were already supported. Mix & Multiply Transparency Objects with Mix or Multiply transparency are now also exported as SVG. Export group as single image Sometimes you may want to force a group of objects to export as a single image, even when you have the Shapes as SVG option on. There has always been an option for this, but the UI for this is now clearer and simpler, at the bottom of the Utilities > Web Properties > Image tab.
Page 10
Last updated February 25, 2025
New groups export as SVG
With this update, new groups you create (Arrange > Group) when Shapes as SVG is on, will export as SVG
unless you deliberately turn on the above Export group as single image option for the group.
And the same applies to groups created by importing graphics from SVG or PDF files - these groups will
also now export as SVG by default. This means most of the Illustrations in the Content Catalog (Insert >
From Content Catalog, Stock Illustrations), will also export to web as SVG, with all the benefits that
brings.
Improved website performance
In addition to the SVG changes, we’ve made other refinements that will help improve page load speeds for the benefit of your SEO across moblie and desktop devices: • Several JS files are no longer exported when not required. • Optimized CSS by removing deprecated fall-backs. • Reduced render blocking scripts. • Up to 15% improvement in performance for mobile devices in our own tests.Web export improvements for mobile
We’ve made some changes to the way exported documents/websites work on mobile and touch devices, to improve the user experience: • A swipe will no longer change page if there is an active text selection (if the user is trying to select text on a touch device, by dragging on the selection markers on the text, it shouldn’t navigate to the next/previous page if the user misses the selection markers with their drag). • A vertical swipe will no longer change pages on pages with vertical scrolling (on long pages that won’t all fit on the screen, the user needs to scroll by swiping up/down. Therefore this shouldn’t navigate to the previous/next page, only horizontal swipes should). • Improved page animations on pages with vertical scrolling. Other web export fixes: • Some characters missing from web export due to self-hosting of Google Fonts. Fixed. • Can’t interact with a form that has reveal animation applied. Fixed.
Page 11
Last updated February 25, 2025
Web Windows to Edge
There are several functions in Web Designer that bring up a web browser window inside the application, to display content, including:The Widget editor
Used when inserting/editing most of the widgets available in the Online Content Catalog.Google Font Finder
Launched when you click Add in the Google Fonts section of Fonts menu.Symbol picker
Launched when you click Insert > SymbolErase Tool Guide window
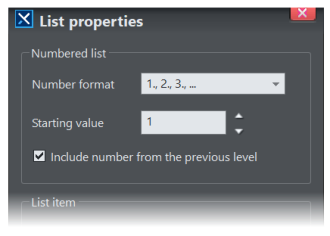
Until now these have relied on using a variant of Internet Explorer. But since Internet Explorer is coming to the end of its life and support for it on the web is declining, it’s time to upgrade these windows. The Widget Editor in particular was becoming a problem, as external widget provider websites have been dropping support for Internet Explorer. So with this update, all the above web windows are now using the latest Microsoft Edge technology instead.Numbered Lists - show all level numbers
Normally when using Numbered Lists, only one number is shown at the start of each list point, as in the left example below. But now there is also the option to show parent numbers too, as shown in the example on the right: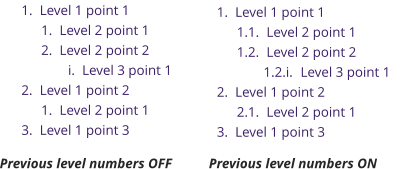
Page 12
Last updated February 25, 2025
This new option is available in the List Properties dialog. To show the dialog, place the text caret in a list,
right-click and choose List properties … in the context menu.
Change font size and Auto-fit
Auto-fit is a feature on a text area, whereby the font size of the text is set automatically by Web Designer so that the text fills the text area container exactly. See the vertical text alignment option on the Text Tool InfoBar . This works even when you have a mix of different text sizes - the relative size differences are maintained. However if all the text is the same size, and you don’t realize that auto-fit option is on, it can be confusing. Attempting to change the font size manually will do nothing, because the font size is set automatically. It’s an easy mistake to make if you’re editing a template and don’t realize that auto-fit is on. So now if you attempt to change the font size on all the text in a text box with auto-fit on, auto-fit is turned off automatically, so that the text size change will just work. The same happens with the related Shrink text on overflow option. Other text handling fixes • Serious error merging in List Styles on paste/import. Fixed. • CID font Noto Sans causes serious error. Fixed.Multi-line SmartField Values
SmartFields are another great time-saving feature of Xara Wb Designer, offering an efficient way to deal with commonly used text phrases that you want to insert in multiple places in text. In this update we’ve added the ability to have multi-line SmartFields. Open the SmartFields dialog (Utilities
Page 13
Last updated February 25, 2025
> SmartFields…), select a SmartField in the list and press the new Edit button, to bring up the multi-line
text editor.
SmartFields can now be multi-line- postal address is a typical example
Where a value has more than one line, only the first line is displayed in the dialog and a … symbol in the
right column indicates that the SmartField has more than one line. You can also click in the right side
column to bring up the multi-line editor and see the full multi-line text. Note you can still edit single line
values directly in the dialog.
Shape Tool
A nice improvement for vector illustration has been made to the Shape Tool, with the introduction of an easy way to maintain the angle of the bezier curve when you drag its handles to change its length. Now when dragging a point or curve handle you can hold down Alt to constrain the movement of the handle relative to its original angle with nearby points. It works for both curve handles: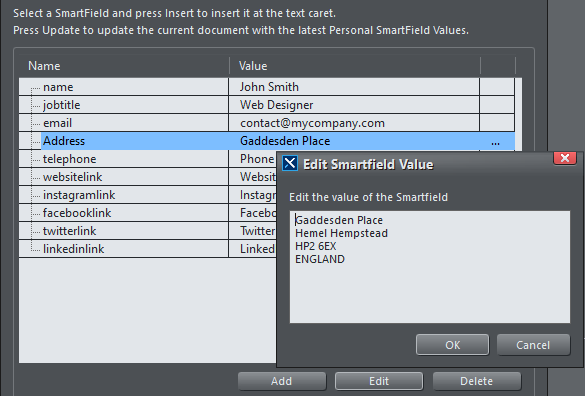
Page 14
Last updated February 25, 2025
(the Shift key can also be used to balance the control handles around the selected smooth point)
and point handles in shapes with straight lines:
(In this case the Shift key chooses which of the two possible angles connected to the selected point should
be used to constrain the angle of the dragged handle. See the Online Help for more details.)
Other Improvements & Fixes
Text
• Serious error merging in List Styles on paste/import. Fixed. • CID font Noto Sans causes serious error. Fixed. • External text pasted into list not added as list items. Fixed.Web Export - Buttons
All buttons under Components > Buttons in the Online Content Catalog have been updated. These are now SmartShape buttons. The entire button, including mouse-over state, reside on a single layer instead of parts of the button being on the MouseOver layer as with previous buttons. This makes it easier to use buttons in multi-layer designs. It’s also easier to change their widths and to resize them.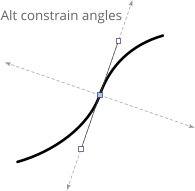

Page 15
Last updated February 25, 2025
Other Web Export
• WebP export fails after exporting a low bpp PNG. Fixed. • Some characters missing from web export due to self-hosting of Google Fonts. Fixed. • Can’t interact with a form that has reveal animation applied. Fixed. • Repeating photo failed to ‘stick at top’. Fixed. • Some non-JPEG images get exported as JPEG in web export. Fixed. • Web export hung exporting specific document with repeating group. Fixed. • Links applied to list paragraphs should not include the list bullet/number. • Error using popup photo feature with photo gallery widgets. • Image Alt-text missing in web export of document.Other Import/Export
• Wrong miter on imported SVG. Fixed. • Word document caused serious error on import. Fixed. • EPS import fix.Other
• Templates updated with latest widgets. • Company and licensee information now shown correctly in Help > About. • Opening color editor onto page color initially shows ‘no color’. Fixed. • Applying color to a page no longer turns on page shadow automatically. Page shadow can still be turned on/off in File > Page Options … . • FX Painter Tool profile adjustment not working. Fixed.Version 22.1 (Sept 2022)
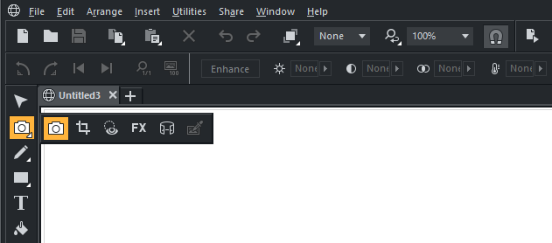
Table Tool
Tables are often a key part of any business document, which is why we’ve been working on a new, very flexible and powerful Table Tool, to replace the old Smart Table SmartShapes. You will find the new tool at the bottom of the main Toolbar on the left . The Table Tool InfoBar is where you can change the settings for a selected table and for selected cells within a table.
Page 16
Last updated February 25, 2025
Table Tool InfoBar
Creating Tables
In the Table Tool, click the first button on the InfoBar to quickly create a new table . Or you can click- drag on the page, to drag out a new table with the number of rows and columns you want. There’s also a great range of professionally designed tables in the Online Content Catalog (Insert > Table > Tables …), all the existing table designs have been updated and we’ve added 20 completely new designs.


Create table
Cell spacing
Table background color
Insert rows


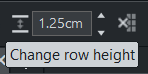
Row height
Delete rows

Insert Columns


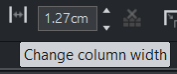
Column width
Delete column


Cell padding
Cell horizontal justification
Cell vertical justification
Cell background color
Merge and split cells
Cell borders

Page 17
Last updated February 25, 2025
Some of the table designs in the Online Content Catalog
Table Size
In the Selector Tool, single-click to select the table, then simply drag the table width/height handles to change the width/height of the whole table. Or you can set the width and height in the InfoBar, as you would with any other object.Changing Rows & Columns
When you have a table selected in the Table Tool, move the mouse pointer over the hotspots as shown below.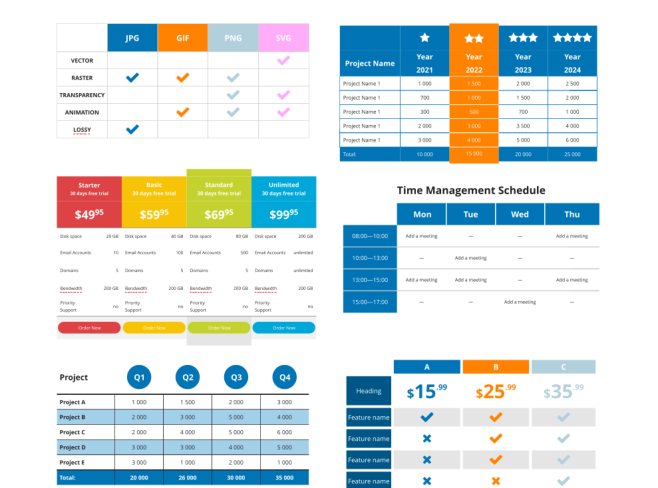
Page 18
Last updated February 25, 2025
Using these controls you can quickly add rows and columns, change row and column sizes, select and
delete rows and columns, all directly on the table without using the InfoBar. Use Ctrl+click or Shift+click on
the row and column headers to select multiple rows/columns. Backspace will also delete a selected row or
column (whereas Delete will delete the contents).
You can set the selected row heights and column widths on the InfoBar numerically, which makes it easy to
give multiple rows or columns the exact same sizes.
Selecting Cells
Selecting cells you want to change is easy. First click to select the whole table, then in the Table Tool you can click on individual cells to select them. Or click-drag to select a rectangular range of cells. You can also Ctrl+click on a cell to add it to the current selection, or Shift+click to extend the current cell selection range. You can also select multiple cells while in the Text Tool, by simply click-dragging.Cell Contents
Once you have selected the cell(s) a simple Delete will delete the contents. The usual copy and paste commands will work, Ctrl C and Ctrl V. Font, font size and color can be changed like regular text.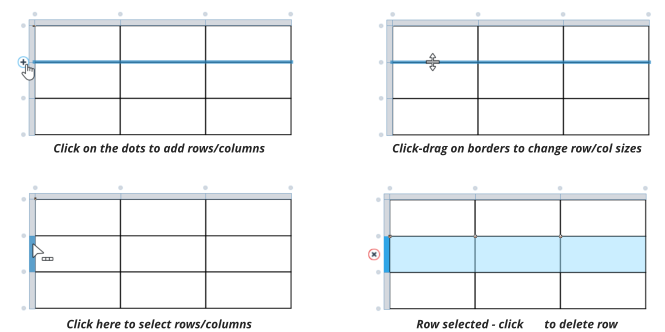

Page 19
Last updated February 25, 2025
Cell Background Color
By default cell background color is white. To change this, select the cell or cells you want to change, and click the new color you want in the Cell color background dropdown on the right side of the InfoBar, which includes all the theme colors in the current document. If you select the Edit option in that dropdown, you can open the color editor to create a custom color. Alternatively you can right click any color on the color line and select Set Table Cell Background. Note there is also a table background color behind the cells, which you will see if you open up spacing between the cells; see Table Spacing below.Cell Justifications
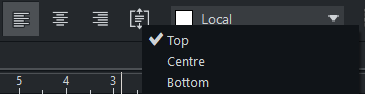
You can choose between left, right and center justified text using the buttons on the InfoBar. Use the vertical alignment dropdown to choose between top, center or bottom aligned text in the cell.Cell Borders
Click the Borders button on the right end of the InfoBar to open the Borders dialog. Borders Dialog First select the cell(s) you want to change as this dialog always works on the selected cells only. In the top Border Filter section of the dialog you first choose which borders you want to change. For example if you want to change only the right side of the whole cell selection, select the filter. Then as you change the border style, width and color in the lower half of the dialog, only that right side border will change. If you

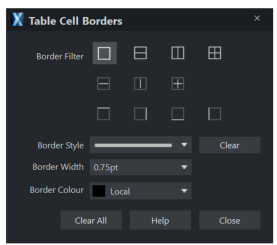
Page 20
Last updated February 25, 2025
want to change all borders of every individual cell in the selection, choose the
filter, then again choose
the border settings you want.
If you have a lot of different border colors, styles and widths in your table, you may have to perform
several border changing operations on different cell selections with different Border Filters, but every
possible combination of borders on a table is possible!
Cell Padding
Cell padding is the space you see between the text in a cell and the borders of that cell. In most cases it’s desirable to have some non-zero padding applied, so text doesn’t appear too close to the cell borders.Table Spacing
The table spacing setting lets you add space between all the cells of the table. Most tables tend to have zero spacing, meaning that cell borders overlap with no space between one cell and the next. The color you see in the spaces between cells, blue in the example above, is the Table Background Color, which you can also set using the Table Background Color dropdown towards the left of the InfoBar, or with a right click on a color in the color line > Set Table Background.Merging & Splitting Cells
Select multiple cells and click the Merge button on the InfoBar, to merge them into a single cell. For example you can easily add a header row to a table by selecting all the cells in the first row and merging them into a single cell. To unmerge/split cells again, select them and click the Split button.Useful Table Shortcuts
• Double click on a cell in the Table Tool, to jump to the Text Tool and start adding/editing text in the cell.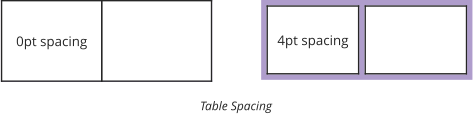
Table text with
no padding
Table text with
4pt padding
Cell Padding

Page 21
Last updated February 25, 2025
•
When you’ve finished typing in one cell, press Tab to jump to the next cell, or Shift+Tab to move to
the previous cell. When you are in the last cell of a table, pressing Tab again will automatically add a
new row so you can keep extending the table.
•
Clear the contents of all selected cells by hitting the Delete key. Delete will also clear the contents of
a selected row(s)/column(s), whereas Backspace will delete the row(s)/ column(s).
•
If you are in the Table Tool with a cell selected and you press the Return key, Xara will switch to the
Text Tool and place the caret at the end of the text.
•
You can set cell background colors and table background colors using the color line, as well as on the
InfoBar. Select the cells, right-click on the color line and choose from the menu.
•
You can drag and drop embedded objects between cells.
Other Fixes & Improvements
• Pasting list items from external source into list, did not add list items. Fixed. • Docx file caused serious error opening. Fixed. • Inserting components via the Insert menu will always brand the components with the current document styles and colors, without asking the user as previously. • Missing handles in Mold Tool. Fixed. • Scrollbar thumbs now more visible against scrollbar backgrounds. • Installation problems for some users caused by missing MS VCRUNTIME DLL. Fixed. • Can’t scroll to all pages in Page & Layer Gallery due to new page name position. Fixed.Web Themes (22 Sept 2022)
We’ve added a set of 20 new website templates to the collection - from cars and spas to food blogs and weddings. You can find them in the Online Content Catalog in a new Websites > Creative Websites folder. All include mobile variants. Browse the new Creative Websites folder in the Online Content Catalog
Page 22
Last updated February 25, 2025
Version 22.1.1 (27 Sept 2022)
New Table Tool Fixes
• Cell selection behavior with merged cells improved. • Undo fails after resizing table column while a cell is selected. • Error when pasting a larger table into a smaller table. • Error after closing document with table cell selected. • Difficult to change cell background color. • Status line text misleading for column grid position drags. • Applying borders to merged cells doesn’t work as expected. • Unselected table backgrounds still appearing when in Solo mode (Page & Layer Gallery). • Serious error resizing column with merged cells.Version 22.2 (05 Oct 2022)
Table Improvements
Re-order rows & columns
You can now re-order rows and columns using drag and drop. To move a single row, simply click+drag on the row header. As you drag up/down, a thick blue line shows you where the row will be moved to. To move multiple rows at once, first select the rows (use Ctrl+click and Shift+click to add rows to the selection) then drag on one of the row headers. Similarly you can move columns left/right using the column headers.Convert old tables to new
The old Smart tables will continue working as before, but will not be improved in future. But now with one click you can convert these to new tables, so that you can edit them with the new Table Tool. Whenever you click on an old table, you’ll be asked if you would like it to be converted. You should see that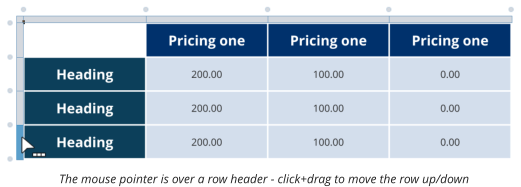
Page 23
Last updated February 25, 2025
the converted table look almost exactly the same as the old table, although you may see some small
differences. The prompt will allow you to refuse the conversion and to turn off future prompts, but we
strongly recommend you convert all old tables to new tables when you next need to edit them. Old tables
will continue to work for now but may not be supported in future.
Other table improvements/fixes
• Some table context menu entries are inappropriate when merged cells are selected. Fixed. • Minimum cell size reduced to 1mm. • Problem copying and pasting cells containing embedded objects. Fixed • Changing page height interactively is slow/difficult in documents with tables. Fixed.Selection improvements
The following changes have been made to selection handling in response to user feedback and to make selection more consistent across different object types.Offset handles
Selector Tool transform handles are now offset by a small distance so that they don’t obscure any part of the selected object, or get in the way of any other handles on the object. The offset remains constant for all zoom levels and does not affect object snapping. In addition to the lollipop rotation handle, there are hidden rotate ‘hotspots’ just inside the 4 corner resizing handles (in the offset gap).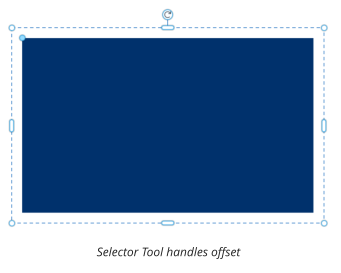
Page 24
Last updated February 25, 2025
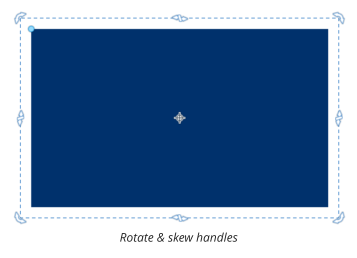
Rotate and Skew mode
If you click a second time on an object that is already selected, the selection handles change to show rotation and skew handles. Each time you click, the handles toggle between the two modes. You can also change this mode using the handle on the Selector Tool InfoBar. The skew operation used to rely entirely on dragging hidden handles near the stretch handles or on the InfoBar field, which only skews in one axis. It was too easy to drag the hidden skew handles by accident without realizing it, resulting in unwanted skew effects in a document. So the hidden skew handles have been removed completely and skewing by dragging is now only available in Rotate & Skew mode, using the new visible handles.SmartShapes & Photos
The Selector Tool only shows SmartShape handles that don’t interfere with the (now offset) transformation handles. This means that the Selector Tool handles now always work consistently, whatever is selected.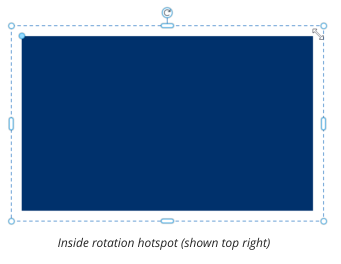

Page 25
Last updated February 25, 2025
The most significant result of this change is that photos can now be scaled and stretched by any of the
selection handles. Switch to the Quickshape Tool tool to see all the handles of a SmartShape and to the
Photo Tool to see all photo related handles.
Double-clicking on a SmartShape now switches to the Quickshape Tool where all its handles are always
available, just as double-clicking a photo switches to the Photo Tool.
Note the two different effects of dragging photo stretch handles:
•
In the Selector Tool stretching keeps the center of a photo in the center of the object and only scales
the photo if it needs to make it fit the new shape. This is the least intrusive way to stretch a photo
without distorting it and is appropriate when the photo is being stretched along with other objects.
•
In the Photo Tool stretching the photo shape keeps the photo position fixed and only moves it, or
starts to scale it, if required to fill the shape. This is most appropriate when editing a photo on its
own.
Stretching & Squashing
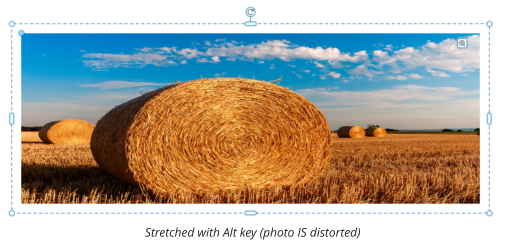
Wherever possible, stretching objects will stretch their outer shape and automatically reformat the contents to fit in the stretched shape, without distorting. For example when stretching a rectangular object that has rounded corners, the corners won’t distort, they’ll remain circular. This is called Smart Transformation and it prevents the introduction of unwanted or accidental distortion into documents. However, sometimes you may want to deliberately stretch both an object and its contents (e.g. to stretch/distort a photo or some text).
Page 26
Last updated February 25, 2025
It is now possible to stretch any object, including Text and Photos, by holding down the Alt key to disable
Smart Transformation when dragging the Selector Tool’s stretch handles.
Other Selection improvements
• The Selector Tool now shows the full width of a text column, instead of just the width of text in the column. This makes text columns consistent with text areas/boxes. • Serious error dragging Smart Duplicate handle on objects with Push applied. Fixed.Make Repeating
Repeating Objects are used where you want the same object to appear on multiple pages of a document, in the same position on each page. They are most commonly used for page headers and page footers. Until now the only way to make an object repeating was to use the Arrange > Repeat on all pages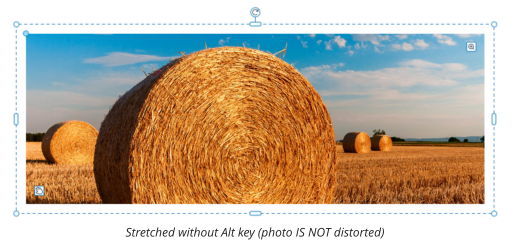
Page 27
Last updated February 25, 2025
operation. This makes a copy of the object on every single page of the document. This is great if you want
the object on every page, but sometimes documents have more than one different page design and you
may want one Repeating Object only on some of the pages and perhaps a different Repeating Object on
other pages.
Now there is a new operation Arrange > Make repeating, which simply makes the current selected object
into a Repeating Object, without making any additional copies of it on other pages. Once you’ve done this,
you can then copy and paste the Repeating Object to whichever pages it’s needed on. Note that you can
achieve this very quickly by first selecting the target pages in the Page & Layer Gallery (use Ctrl+click and
Shift+click to select multiple pages in the gallery), then paste, and the object will be pasted onto all the
pages you selected.
Other fixes & improvements
• Inconsistent font sizes when pasting same sized text into ‘Shrink on overflow’ text boxes. Fixed. • Icon line widths wrong when replaced with SVG. Fixed. • Serious error opening Document info with specific document. Fixed. • Help users recover from unusual installation, update and activation errors. • Check and (when necessary) fix the Windows Explorer ‘thumbnail view’, automatically during program startup. • When replacing a color in an object, Xara will no longer preserve shading if there is only one shade of the color used. The user’s chosen color is applied directly instead.New Templates (12 Oct 2022)
A bonanza of 100+ new templates in the Online Content Catalog of Xara Web Designer+: • 2 website themes, in addition to the 20 added last month (in Websites > Creative Websites) • 57 extra tables, so you can make the most of our brand new table tool (in Components > Print & Web Components > Tables) • 42 social media buttons, to help you maximize the potential of social media (in Components > Print & Web Components > Buttons > Social Media) You can find them now in the folders indicated above or in the WHAT'S NEW folder in the Online Content Catalog.Photo Overlays (19 Oct 2022)
Almost 1300 extra Overlay Photo Filters in the Online Content Catalog of Xara Web Designer+. Overlays can be added to your photo, even on top of other photo filters, to provide a massive array of different creative
Page 28
Last updated February 25, 2025
effects.
You can find them in Components > Image resources > Photo Filter Presets > Overlays, in 4 new
categories (Bokeh, Color Gradient, Light Leak and Snow). Simply select your photo, then select the overlay
and click Import.
1285 new photo overlays in the Online Content Catalog
Version 22.3 (24 Oct 2022)
Table Improvements
Copy/paste external data
An important step forward for our new Table Tool. You can now copy and paste text and numbers from your spreadsheets and other sources into Xara tables. Simply copy the cells you want to copy in your spreadsheet, then in the Table Tool select a table cell and paste (Ctrl+V). Technical notes: This should work with data from any application that is able to place TSV (Tab Separated Values) as unformatted text onto the clipboard, when you copy it. If you find it doesn’t work with an application you use, please let us know. Support will be added for pasting data from HTML format in a future release.Other table improvements
• Table reformatting fixes. • Pasting an image into a selected cell in the Table Tool now works as expected. • Pasting an image into a cell no longer increases the row height excessively. • Error deleting rows that are part of a merged row. Fixed. • Error pasting RTF tables. Fixed.


Snow
Light Leak / White
Before
After
Before
After


Color Gradient
Light Leak / Blue
Before
After
Before
After
Page 29
Last updated February 25, 2025
Other fixes & improvements
• Error when pasting list items into an existing list. Fixed.Version 22.4 (08 Nov 2022)
Table Improvements
Paste of multi-line text
We have improved handling of multi-line text when copy and pasting data from external applications such as spreadsheets into your Xara tables, see 22.3 above.Paste unformatted
Sometimes when working with tables you’ll want to copy the contents of one table to another table. If you simply copy the cells of one table, and paste them onto another, this will also paste the style of the source table cells, as well as the content. Now there is a new Paste unformatted option, in the right-click context menu. So to paste just the cell contents, copy (Ctrl+C) the source cells in the first table, select the target cells in the second table, then right-click and choose Paste > Paste unformatted from the context menu.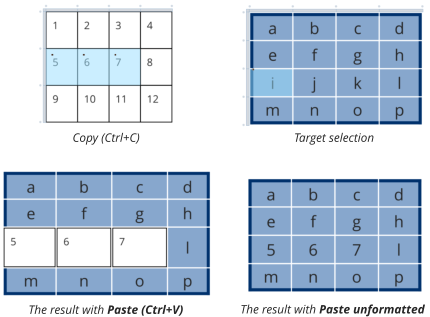
Page 30
Last updated February 25, 2025
Other table improvements
• Improved handling of multi-line text copied and pasted from other applications. • Other clipboard handling improvements. • Tables don’t always redraw correctly after width/height changes. Fixed. • Error when importing a particular table with color matching. Fixed. • Extending row selections using the Shift key is now more reliable. • Error when exporting a PDF while table cells are selected. Fixed. • Can’t click/drag on a table’s background to select/move the table. Fixed.Other Improvements
• Print options: The options in the print dialog have been renamed to make it clearer at a glance what they do: Automatic is now more helpfully described as Actual size and Fit as Best Fit. Tip: if you select Best Fit your design is moved to the center of the page and expanded or shrunk to suit the paper size, the print dialog will show the degree of scaling. • Second and subsequent pastes of the same clipboard contents now work the same way as the initial paste (a list of formats to choose from is shown, if there is a choice). This means if you don’t like the results of the first format you choose, you can simply paste again and choose a different format, without having to re-copy from the source application. • Lock icons are now shown in an “unlocked” or “locked” state.Web Themes (10 Nov 2022)
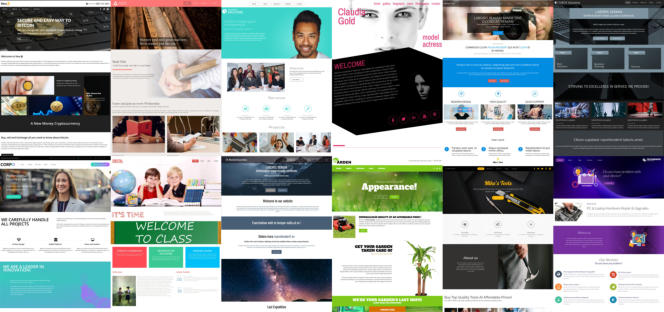
The template bonanza of 2022 continues with another 12 new website templates, all with the latest animation effects and SEO optimizations - and totally customizable to fit your business or personal website requirement! You can find them now in the Online Content Catalog in the new Websites > Creative Websites folder. • All include mobile variants • Now with a 1280 pix wide main variant for the best possible results on your 4K monitors (but of course they auto scale to lower resolution on other devices) • Default image export is now WebP for faster loading, giving a better experience for your visitors, and better SEO results too.
Page 31
Last updated February 25, 2025
12 modern new website themes added to the Online Content Catalog
Version 22.5 (07 Dec 2022)
Table Improvements
Export of tables to Word & PowerPoint
Xara tables now appear as editable tables in MS Word, when documents are exported to Word (.docx) format. Xara tables should now also look visually correct in exported MS PowerPoint (.pptx) presentations, but the tables are not currently editable in PowerPoint (text can be edited but the table won’t update).Table Fixes
• Making a copy of a table by dragging on it with right mouse button down gives an error. Fixed.Font handling for missing characters
Automatic font selection
Xara Web Designer+ now helps you to find and apply fonts that support characters that are not supported by the majority of Google fonts. For example if you enter or paste a Chinese character such as into text that is using a typical Google Font such as Open Sans, the character won’t appear correctly because Open Sans does not support Chinese characters. Instead you will see or similar in the text. Now when you enter such a character, Xara will check your device for fonts that do support the character. If it finds one, the font will be changed so you should see the character appear correctly.

Page 32
Last updated February 25, 2025
When changing the font automatically in this way, Xara will choose a font that is already being used in the
current document where possible, to avoid introducing lots of different fonts.
NOTE: Currently this automatic font selection only happens when pasting in unformatted text at the text
caret, not when pasting from other formats such as HTML. Go into the Text Tool, place the text caret, select
Paste and choose Unformatted text. This will be improved to include all types of paste in a future update.
Alternative Font Suggestions
If you don’t like the automatically chosen font, select the character(s) in the Text Tool, right-click and you should see a Font Suggestions entry at the top of the context menu. This shows you all the fonts installed on your device that support the first character in your text selection. Font suggestions for selected Chinese character You’ll see the selection update to preview the font that is under your mouse pointer, so you can quickly choose which font works best.Google Fonts
For Chinese, Japanese and Korean characters, Xara will first look for the most popular Google fonts that support the character set, if any are installed on your device. You can find the names of such fonts by searching for them on Google Fonts, using the Language filter, then download and install them onto your device using the Add option in the Google Fonts section of the Fonts menu in the Text Tool of Xara Web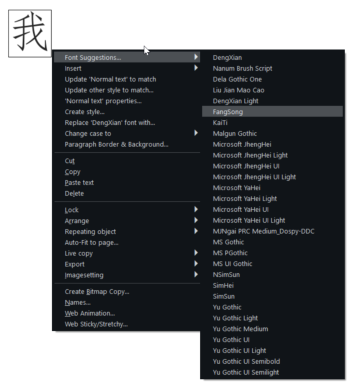
Page 33
Last updated February 25, 2025
Designer+. Once installed, you should see them in the main Fonts menu and in the Font Suggestions
menu described above.
Line Gallery
In previous versions of Web Designer, when interacting with the Line Gallery for the first time in every session, there was a delay of a few seconds while Xara downloaded all the different brush definitions that are available in the gallery. In some cases this also caused the current selection to be lost. This has now been improved so that each separate brush definitions folder is loaded only if/when needed, so there is no initial delay when using the gallery and the selection is always maintained.Account menu
Web Designer+ now has a new Account menu on the main menu bar. This currently contains options for managing your Xara subscription (upgrade your subscription, or update your billing address or credit card, download invoice) and for managing members of your team, if you are using Xara as part of a team. Both options open in your default web browser. In future this menu will include other options for managing your account and device registrations.Other improvements
• Scrolling and text editing performance improvements (noticeable with larger documents with many pages). • Image export setting sometimes changed unexpectedly when page clipping option changed. Fixed.Photo Overlays (13 Dec 2022)
We’ve added another 1200 Photo Filter Overlays to the Online Content Catalog of Xara Web Designer+. Overlays can be added to your photo, even on top of other photo filters, to provide a huge choice of creative possibilities. You can find them in Components > Image resources > Photo Filter Presets > Overlays, in 4 new categories (Light Rays, Night Sky, Rose Petal and additions to Light Leak). To apply the overlay simply select your photo, then select the overlay and click Import.
Page 34
Last updated February 25, 2025
Mix and match the filters and overlays for an almost infinite choice of photo effects
Version 23.0 (13 March 2023)
Designs Gallery - Now Online
The Designs Gallery now automatically connects and updates online, so it has the same content as the Content Catalog, except for the stock photo & illustration and symbol libraries So you can access the same content whichever way you prefer. Generally the Designs Gallery is more convenient when importing components and other content into the current document, because you can use drag and drop from the gallery onto your document, instead of opening the Content Catalog on top of it. So for the maximum productivity, all the Insert menu options that insert objects from the catalog now open the Designs Gallery instead of the Content Catalog. The File > New from Content Catalog option works as before, because the larger window of the Content Catalog is usually best for browsing document templates.New Widgets
Widgets are a powerful way to enhance the functionality of your website, which is why we've added a big selection of new widgets, both to existing categories such as e-commerce and forms, and in completely new categories such as chat and appointment managers. You can find them in the Online Content Catalog/Designs Gallery. What’s more we’ve improved the editing experience, see the section below on Widget Editing for more information.


Page 35
Last updated February 25, 2025
Modular Websites
Check out our YouTube channel on Modular Websites and Web Blocks. Welcome our new concept of Modular Websites. Whether you need a simple landing page or a full featured e-commerce website, we guarantee that you won’t find a quicker and easier way to create that showstopper website that you’ve always imagined. A Modular Website page is very simple; it’s just a vertical stack of ready-designed Web Blocks, one above another, with navigation controls at the top. Websites can be built very rapidly by just adding as many different Web Blocks as required to build up a web page. Add your content and you’re done. What’s more a mobile-friendly variant of the website is created automatically. To get started with your Modular Website, you can choose one of the pre-built website templates from the Content Catalog and add/remove Web Blocks to customize it. Or you can begin with a Start Page which has just the navigation, and then drag and drop Web Blocks from the Designs Gallery one by one to build up your website. All the capabilities for building websites without Web Blocks (now called ‘Freeform Websites’) are still available for more advanced users, but you will find that using Web Blocks is the simplest, quickest way to build your new dream site. A modular website with a Web Block selected
Page 36
Last updated February 25, 2025
Getting Started: Choose a Template Website or Start Page
Ready-made website templates can be found in the Content Catalog or Designs Gallery, under Modular Websites > Website templates. Or if you want to start with just the navigation and build up your website yourself, choose Blank (website) from Modular Websites > Website Templates. There is also a blank Modular Website template, with just navigation, under File > New.Adding Web Blocks
You’ll find a wide selection of different Web Block designs in the Designs Gallery under Modular Websites > Web Blocks > Layouts. Double-click on an item in the gallery to add it to your website document. Each new block is added to the bottom, below all your existing Web Blocks. Or use drag & drop to insert at any position. You can then add your own content by editing text using the Text Tool, replacing images, etc.Working with Web Blocks
Whenever you click on an object that is part of a Web Block, you’ll see a green Web Block bar appear to the left of the page, as shown below: Photo selected inside Web Block Objects can be selected inside the Web Block with one click, then you can edit objects using the usual tools on the main Toolbar on the left; Text Tool for text, Photo Tool for photos, etc. To select the Web Block itself, click on the Web Block bar. A green outline around the whole Block shows that it is selected, and the Web Block bar is brighter.
Page 37
Last updated February 25, 2025
Web Block selected
Deleting a Web Block
To delete an entire Web Block that you don’t want, simply select it by clicking the green bar and Delete.
When a Web Block is deleted, any Blocks below it are automatically moved up to close the gap.
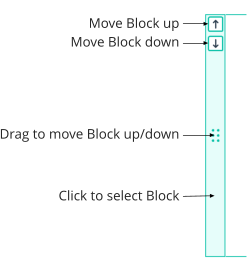
Changing the Web Block order
Web Block bar
Use the arrow buttons on the Web Block bar to move Web Blocks up or down. Or you can click-drag on the
center of the bar and drag the block up or down. As you drag, a horizontal line appears between Web
Blocks, to indicate the drop position.
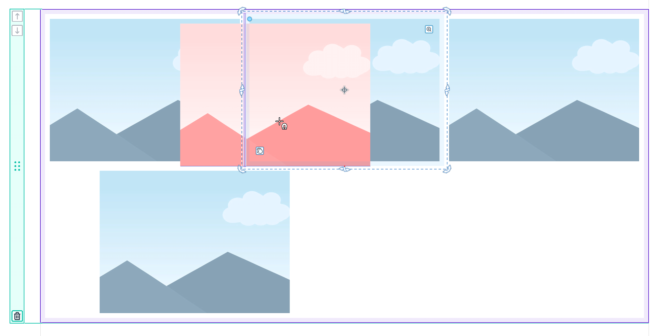
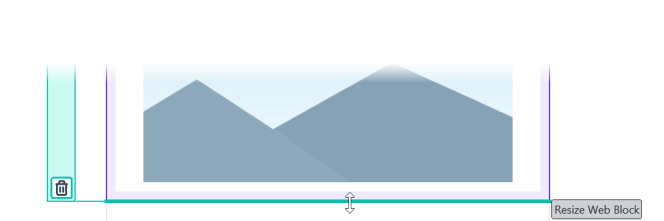
Adjusting the Web Block height
Many of the Web Blocks can have their height adjusted by click-dragging on the bottom edge of the Block,

Page 38
Last updated February 25, 2025
as shown below:
Adjust Web Block height
Note the Web Block needs to be selected first (click on the green bar). Then move the mouse pointer over
the bottom edge and you should see the mouse pointer change as shown above.
Copying Web Blocks
To copy a Web Block, select it by clicking on its Web Block bar and then use Copy (Ctrl+C) as you would for
any other object. When pasting, the Web Block will appear immediately below the selected Block, or at the
bottom of the website if there is no selection. You can copy and paste Blocks from one Modular Website
document to another.
Widget Blocks
Some Web Blocks include dynamic content (widgets) that can considerably enhance the value of your website, such as video players, maps and forms. After you’ve inserted one of these Web Blocks, click on the widget inside it and you’ll see an Edit option appear on a context menu. Click Edit and a window appears allowing you to setup your widget. See the section below on Widget Editing for more information.Widget Editing
Now when you insert or edit a Widget you’ll see this new Widget window appear.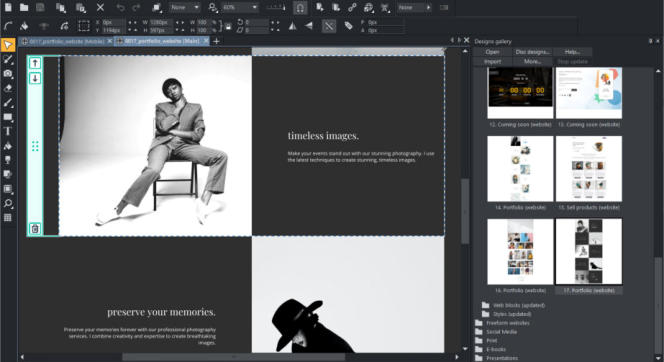
Page 39
Last updated February 25, 2025
Widget Editor
For widgets that are provided by an external service, such as a Google Map, configuration of the widget in
the external service is now done using your regular browser, instead of inside a web window inside
Designer+. This means that signing into the external service will generally be easier, because your browser
probably has features helping you sign-in, such as saved passwords or a password manager. Also you can
work in a full size browser window, rather than in a smaller web window inside the application.
Press the Edit in browser button to open the external service in your default browser. Once you’ve setup
your widget, copy the widget code from the external service and then come back to Designer+ to paste that
code into the widget window.
Most widgets have an online help page available, which will advise you on how best to use the external
service with Designer+, how to find the code in that service and other helpful tips. Press the How to get
HTML code link to open this help.
There are some lesser used widget options in the Utilities > Web Properties dialog that are not available
in this new window. Press the Advanced button to jump directly to this dialog, if you need to use these
options.
Table Improvements
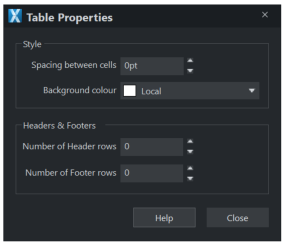
The Table Tool InfoBar has been improved, with the Table background color and Spacing between cells options moved into a new Table Properties dialog.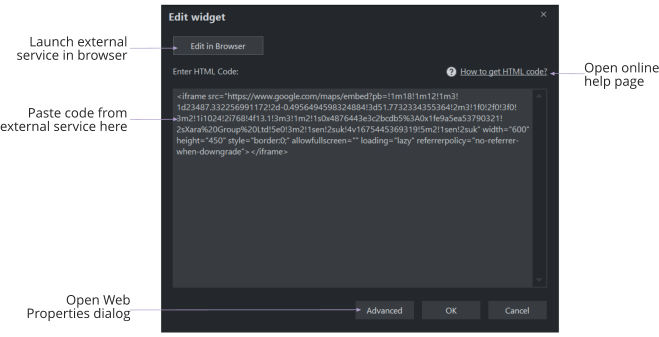
Page 40
Last updated February 25, 2025
Table Properties
Bring up the dialog by clicking the
button on the Table Tool InfoBar.
Header & Footer Rows
In the dialog there are new options for setting the number of header and footer rows on your table. This information is used when copying and pasting the style of a table from one table to another. To do this select a table and press copy (Ctrl+C). Then select a different table and do Edit > Paste > Paste format/attributes (Ctrl+Shift+A). Header and footer rows will become much more important once tables can be split across pages and text columns, which is coming soon to the Table Tool!Other Table Improvements
• Improved support for dotted/dashed table borders. • Serious error right-click dragging a table from one page to another. Fixed. • Table border widths wrong at some zooms in Chrome and Edge. Fixed. • Text links not underlined inside tables. Fixed. • Drag-selecting table cells could cause serious error. Fixed.Web Fixes & Improvements
• New documents/websites will export to .html files instead of .htm. An option to change this for existing documents/websites is coming soon. • NavBar sub-menu displayed without its background. Fixed. • Alt text for background images.
Page 41
Last updated February 25, 2025
Other Fixes & Improvements
• Accounts menu now has options to jump to Team Profile and Downloads page • Bring to front / Put to back / Move forwards / Move backwards operations now work on objects inside groups. Objects are moved relative to other objects in the same group. • Text copied and pasted from PDF reader has incorrect case. Fixed. • Can’t move text caret between consecutive embedded objects with arrow keys. Fixed.Version 23.1 (24 May 2023)
German Support
Web Designer+ now supports both English and German languges. When starting the application for the first time on a device, it will use the current language as defined in Windows. Thereafter you can change the language at any time using Help > Language (requires an application restart).Accounts Menu
The Accounts menu now has some additional options to help you manage your Web Designer+. Account details This option shows you which account email and Team you used to activate Web Designer+. Sign-out Use this if you need to re-activate Web Designer+ using a different account email or Team. This is important if you purchased Web Designer+ using a different email address to the one you used to activate it. Change sign-in details This option opens your web browser to let you change the name or email address in your Xara account.Other Fixes & Improvements
• Deleting all Web Block contents now deletes the whole Block. • Link dialog: Link to page and Link to heading menus are now wider to show longer headings and page names. • Spelling dictionaries have been added for Ukrainian and Amharic. • Adding link to PDF doesn’t work if website is set to export to .html. Fixed.
Page 42
Last updated February 25, 2025
Version 23.2 (5 July 2023)
Working with Responsive Websites
Using Web Blocks in Existing Websites
Our new Web Blocks offer an extremely easy way of to build a new Modular Website (see Modular Websites above). But now you can also use the wide range of Web Block designs in your existing (non- modular) websites. You’ll find the Web Blocks in the Designs Gallery and Online Content Catalog, under Modular Websites > Web Blocks. Add a Web Block by double-clicking on it in the Designs Gallery, or simply drag & drop it onto your page. If you drop the Web Block onto an existing page it will be added to the bottom of the page, just above any footer, and it will automatically adjust to fit the width of your page. But you can now also create completely new pages in your existing sites, built from our large and constantly expanding library of Web Blocks.Improved Positioning of New Live Shares
Now when you Live Share an object with other variants, it is positioned more usefully in those other variants, relative to neighboring objects. Where you need a different layout in the other variant(s), you will still need to manually re-position the shared object, but in most cases this will be a time-saver.Other Web Improvements
• When you delete an object that is shared with other variants, a prompt offers to delete from all variants. • Dragging live shared embedded objects between text areas doesn’t work across variants. Fixed. • Widget/placeholder HTML Head code is now shared across variants, as body code is. • Google Analytics code is now inserted immediately after <head> element, the current recommendation from Google. • NavBar menus with links to headings not updated correctly. Fixed. • Issue with cut & paste of Web Block. Fixed. • Links to SmartFields would only open in current tab. Fixed. • Undo of Web Block height change doesn’t work if smart transform is disabled. Fixed.Personal SmartFields
The set of Personal SmartFields in Web Designer+ (Utilities > SmartFields …) has been extended to match the fields in your Xara Cloud profile, so that templates and documents using these fields will work the same way in both Web Designer+ and Xara Cloud. The new fields in Web Designer+ are full address, website text, facebook text, instagram text, linkedin text, twitter text, tiktok text and link, adding to the great time-saving potential of SmartFields.
Page 43
Last updated February 25, 2025
Other Fixes & Improvements
• + handle disappeared on some SmartShape components. Fixed. • Serious error importing SVG file that has embedded WOFF2 fonts. Fixed. • The number of decimal places shown in the UI is no longer linked to Windows settings, which caused some user confusion. It now defaults to 2 decimal places and can be changed in the registry if required. • The Web Designer+ automatic updater now closes the program automatically to allow update installation to proceed.Version 23.3 (17 Aug 2023)
Navigation Bar Improvements
Change NavBar Style
Previously you could already change the style of your navigation bar (NavBar) by dragging and dropping a new NavBar from the Designs Gallery onto your existing NavBar. This feature has been made more discoverable with the addition of a Change style button to the NavBar dialog, which opens the Designs Gallery onto the NavBars folder. But also you can now simply select your existing NavBar and doubleclick a NavBar in the Designs Gallery to change style.New NavBar templates
We’ve added 101 all-new NavBar template designs to the Online Content Catalog/ Designs Gallery (have you seen the movie?). You’ll find them in Print & Web Components > Navigation Bars in the new folders Standard, Glow, Bevel, Bitmap, Cartoon and Mobile (hamburger style).Use any font in NavBar sub-menus
You can now use any font you like in the menus on a Navbar, you are no longer limited to the restricted set of web-safe fonts. That means you can now use the same fonts you use on other text in your website, including the huge range of Google fonts.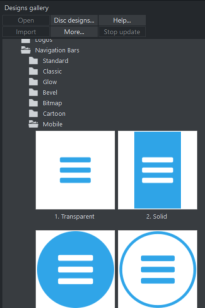
Page 44
Last updated February 25, 2025
NavBar Pop-up menu style - full font list
To change the menu font, double-click on your NavBar and use the Pop-up menu style … button to open
the menu settings dialog.
Web Export Fixes & Improvements
• Link dialog can delay selection changes in documents with many links. Fixed. • Web export problems when exporting with All layers/objects visible. Fixed. • Spurious internal error on second attempt to publish. Fixed. • Screen redraw problem after inserting Web Block from Designs Gallery. Fixed. • Smart duplicate of live shared text column doesn’t work correctly. Fixed. • Umlaut characters not appearing correctly in German popup photo tooltip text. Fixed. • Links to pages wrong after insertion of Web Blocks with links. Fixed. • German characters appearing incorrectly in popup message shown when previewing a single page of a presentation. Fixed. • Menu now closes on touch devices after selecting a menu item.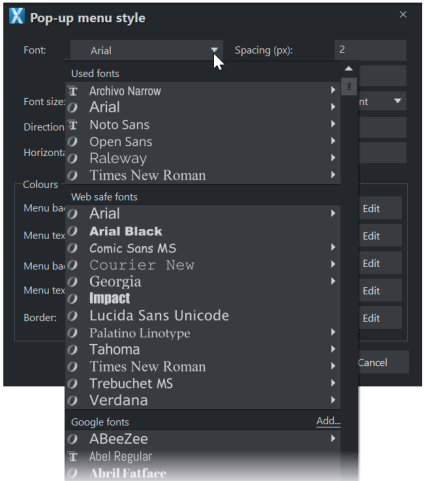
Page 45
Last updated February 25, 2025
•
Document causes export to web to hang during export. Fixed.
•
Image Alt text is now shared across web variants.
•
Web export of Open Sans Light font wrong when Bold applied. Fixed.
Other Fixes & Improvements
• Improved reporting of program activation problems. • Holding down Alt while resizing image width/height now distorts the image, as intended. • Serious error when applying elliptical transparency to a group. FixedVersion 23.4 (31 Aug 2023)
Support for Dutch, Spanish & French
Designer+ now supports Dutch, Spanish and French, in addition to the English and German languages already available. When starting the application for the first time on a device, it will use the current language as defined in Windows. Thereafter you can change the language at any time using Help > Language (requires an application restart).Other Fixes & Improvements
• Online help articles improved to help with publishing/FTP problems. • Web export: Button clickable prior to being visible. • Various other small fixes & improvements.Version 23.5 (15 Nov 2023)
Elements
Elements is the new name for what was previously known as the Online Content Catalog. As before, all the same content is available through Elements and in the Designs Gallery.Improved Web Blocks
Web Blocks were introduced in v23.0 as an all-new way to create modern websites, more quickly and easily than ever before. In this release Web Blocks have been improved to make them considerably more flexible, while maintaining the ease of use. TIP: There is a new Introduction to Blocks 2 document in First Look > Introduction. You can now resize objects directly inside a Block, drag objects in and out of Blocks, or from one Block to
Page 46
Last updated February 25, 2025
another, and easily duplicate and delete objects inside Blocks. There is also now a new Flexible Web Block
type, which automatically arrange the objects inside them. Most of the Web Blocks in the Designs Gallery
are now Flexible, making them much easier to use and more powerful.
As with earlier versions of Designer+, to build a website using Web Blocks first either create a new blank
Modular Website (File > New > Modular Website), or open one of the professionally designed Modular
Websites in Elements or in the Designs Gallery. Then you can add new Blocks to your site by dragging
them in from the Web Blocks folder in the Designs Gallery.
Note you can’t directly create your own Web Blocks in Modular Website documents (the option for creating
them is disabled in the Arrange Menu). But you can start with any Web Block from the Designs Gallery and
simply add and remove objects (as described below) to change it into a completely new Block.
Flexible Web Blocks
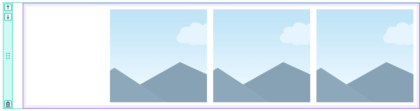
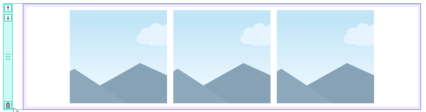
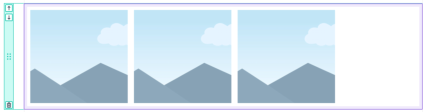
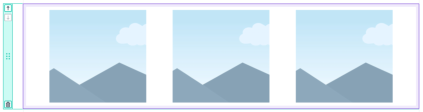
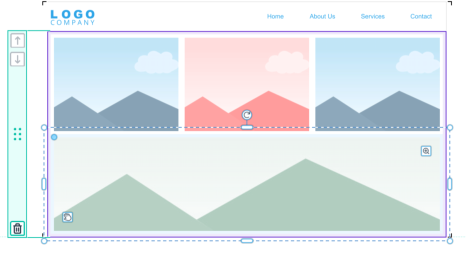
Flexible Web Blocks are Web Blocks that arrange objects inside themselves automatically, according to some simple layout rules that can be set on each variant of a Web Block. As more objects are added to a Flexible Web Block, or objects are made wider, they flow onto new rows automatically, to stay within the width of the page. For example if you start with the following 3 photo Block: and you add 2 more photos, the layout is automatically adjusted to 2 rows of photos, because there is not enough space in a single row for all 5 photos: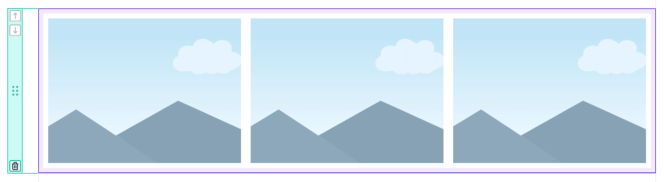
3 photo Flexible Web Block
Page 47
Last updated February 25, 2025
A Flexible Web Block won’t change the width of any of its objects automatically, it will just add as many
rows as required to fit in all the objects, according to the layout rules set on it. With the above example, you
could simply reduce the width of all the photos so they would all fit in one row. Or you might decide to
make the last 2 photos wider, to better fill the second row.
Note the purple outline in the examples above. This outline is visible whenever the Block, or an object
inside it, is selected and it indicates that this is a Flexible Web Block. If you don’t see the purple outline, that
indicates the Web Block’s objects are positioned manually inside the Block.
In a Flexible Web Block each variant (Main and Mobile) can have its own separate layout settings, so the
same objects can be arranged differently in each variant. With the 5 photo example above the photos
would typically be arranged in a single column in the narrow Mobile variant. Each time you add another
object, it is shared with the other variant and positioned according to the layout rules set in each variant.
All the Flexible Web Blocks in the Designs Gallery have been created by a professional designer and so
already have appropriate layout settings in both Main and Mobile variants, so most users should never
need to change those settings. But if you do need to change them, this is done using the Flex Layout
toolbar described below.
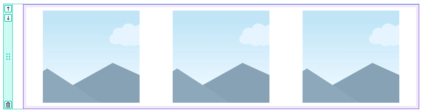
Re-ordering objects
Click-dragging on an object that is inside a Flexible Web Block allows you to change the order of the objects
in the Block. As you drag, a vertical purple line appears to indicate at which position the dragged object will
be placed. In the example below, the red photo is being dragged from position 5 to position 2, so you see
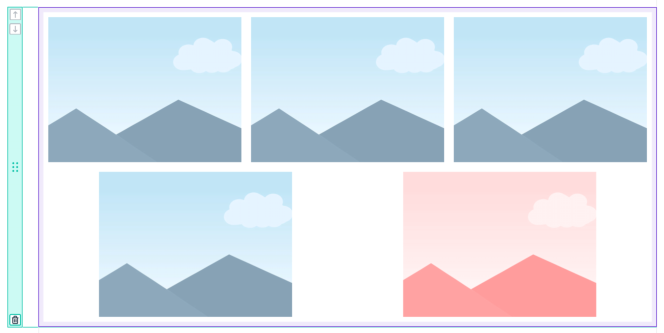
2 photos added
Page 48
Last updated February 25, 2025
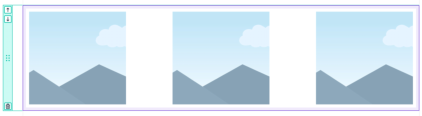
the purple line between the first and second photos as you drag:
So the end result on drop will be:
Moving objects in and out of Web Blocks
With all Web Blocks in the Designs Gallery you can now easily add new objects to them by simply dragging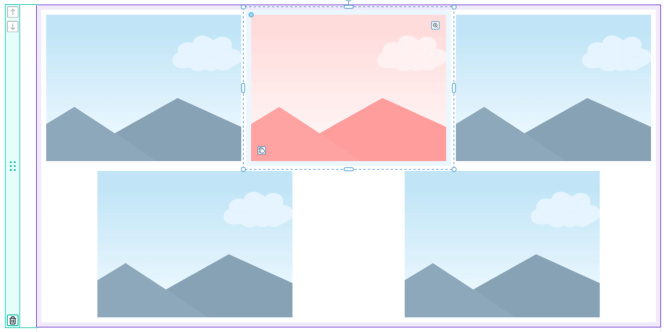
Re-ordered
Re-ordering
Page 49
Last updated February 25, 2025
the object over the Block using the Selector Tool. As do this, you will see the green Block bar, to the left of
the page, light up, so you know which Block you are targeting. If it’s a Flexible Web Block you’ll also see an
insertion point indication, as shown above in the Re-ordering example. On drop, the object is moved into
the Block. If it’s a Flexible Web Block, it will be positioned according to the Flex rules in each variant.
Otherwise the object will be left where you dropped it.
Whenever you add an object to a Web Block, it gets shared automatically with the other variant, so it will
appear on both Main and Mobile variants. If the Web Block is not a Flexible Web Block, you will need to
manually position the object appropriately in each variant.
Similarly you can also drag an object out of a Web Block, to remove it from a Block. Simply click-drag on it
and move it to another Block, or drop it to the side of the page to remove it from the Block. Alternatively
selecting an object and pressing the Delete key will delete the object.
When you initially draw, paste or import a new object into a Modular Website, it will not automatically be
added to a Block. To add it to a Block, simply drag it over a Block, as described above.
If you want to have an object floating above or below a Web Block, rather than being part of the Block, this
can be done by holding down the Shift key while dragging the object over a Block. This prevents the object
being added into the Block. Similarly if you move a floating object you need to hold down Shift to prevent
the object being moved into a Block on drop.
Advanced tip: If you hold down Alt while dragging and dropping an object onto a Flexible Web Block, the
object is added into the Block, but it will be outside of the FlexGroup that is inside the Block.
Changing the height of a Block
Select a Block by first clicking on any object inside it, then clicking on the green Block bar to the left of the
page (the green bar goes slightly darker and the status line says 1 Web Block …”. Then you can move the
mouse pointer over the bottom edge of the Block and click-drag to change its height.
Page 50
Last updated February 25, 2025
Normally you don’t need to adjust the width of a Block as they are the same width as the page. But
sometimes, if you’ve added a very large object to a Mobile variant for example, the Block may exceed the
page width. In these cases you’ll need to reduce the size of the object(s) to fit the page width, then reduce
the width of the Block itself. Do this by dragging on the right or left edges, with the Block selected.
Web Blocks 2
A Quick Introduction to Using Web Blocks 2
Demo: 25 minutes to create a website from scratch using Web Blocks
FlexGroups
A FlexGroup is a new type of group that has the potential to save you a huge amount of time and effort! The objects within a FlexGroup are automatically arranged according to a set of layout settings, which control how objects are spaced in a row, horizontal and vertical alignment, etc. In Modular Websites a FlexGroup is used inside a Web Block, to make the Flexible Web Blocks described above. You can’t create your own Flexible Web Blocks or FlexGroups for Modular Websites (though you can of course edit the ones in the Designs Gallery), but you can create new FlexGroups for any other type of document, such as a presentation or classic website. They are useful whenever you want to organize a variable number of objects on the doc, without having to manually space and align each one. To create a new FlexGroup, select the objects you want to put in it and do Arrange > Create FlexGroup. To ungroup a FlexGroup, select it and use Arrange > Ungroup, or Ctrl+U, the same as for an ordinary group. The layout settings are controlled the same way for a FlexGroup and for a Flexible Web Block, using the Flex Layout toolbar, described below. The width of a FlexGroup is set manually by you and will never change automatically. But the height of the FlexGroup will vary according to how many rows are needed to fit in all the member objects. Flex Layout Toolbar This bar should appear automatically at the top of the Designer+ window whenever a Modular Website document is current. You can also turn this bar on/off in any type of document, using Window > Bars. This bar shows the current layout settings for the selected Flexible Web Block or FlexGroup. Each of the available settings are described below.
Horizontal alignment

Vertical alignment

Row alignment

Flex Layout Toolbar


Page 51
Last updated February 25, 2025
Horizontal alignment
This setting affects how objects are positioned in a row if there is some spare horizontal space. With the 5
photo example above, this will affect how the second row of 2 photos appears. There are 6 options for this
setting:
Justify right
All spare space is on the left.
Justify center
Equal space to the left and
right
Justify left
All spare space is on the right.
Page 52
Last updated February 25, 2025
Note that the small spaces visible between the photos with the first 3 ‘justify’ settings is because each
photo has its own object margin (see below).
Vertical alignment
This setting works the same way as Horizontal alignment described above, but in the vertical direction.
Once again the setting only has an effect if there is some spare space vertically, that needs to be
distributed.
Row alignment
This setting determines how objects in a row are positioned, if they don’t all have the same height. The
options are simply Top, Bottom or Center alignment.
Object Margin
This option allows you to set a margin around an object. For example in the 3 photos Web Block above,
every photo has been given a 10px margin horizontally and vertically, so there will always be at least 20px
between the photos. If you wanted the photos to touch each other with no space between them, you
Space evenly
Equal spaces between each
object and to the left and
right.
Space around
Equal spaces between each
object, half spaces left and
right.
Space between
Equal spaces between each
object, no space left and right.

Top aligned
Center aligned
Bottom aligned
Page 53
Last updated February 25, 2025
would set the margin to 0px on each of them.
You can give all objects the same margins, or set a different margin for each object. To set the margin on
multiple objects together, select one object by clicking on it, then add more objects to the selection by
holding down Shift and clicking on each in turn. Then you can change the margin values on the FlexGroup
bar to set them all to the same value.
When an object is selected inside a Flexible Web Block, you can see some pale blue shading around the
object that shows you the extent of its margins. In the example shown below, we’ve selected the last 2
photos and increased their margins to 100px, to force much more space around them, as shown by the
pale blue shading:
Padding
This option allows you to add space around the whole Block/FlexGroup. When it is selected, the padding
extent is shown in pale purple, around the contents of the Block. In the example below we’ve set 50px of
padding horizontally and vertically:

Margins increased on the lower 2 photos
Page 54
Last updated February 25, 2025
Other Web Improvements
• Save publish settings in document option was being turned off if there are no publish settings. Fixed. • Serious error adding text inside to object in Web Block. Fixed. • Web export: Export of empty href without a nofollow. Fixed. • Web font problems could be triggered by very long analytics code. Fixed. • WebP export library updated, with latest security fixes.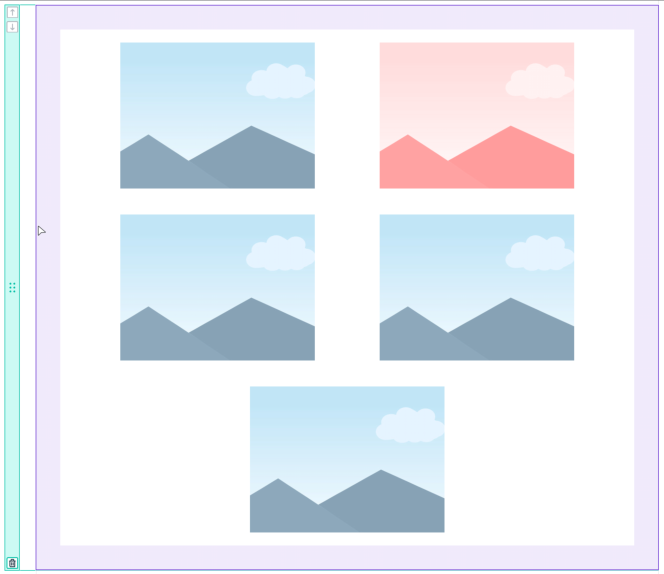
Padding increased
Page 55
Last updated February 25, 2025
Other Fixes & Improvements
• On newly created documents, the document language is now set according to the current device language. • Serious error optimizing a specific PNG file. Fixed. • Tolerance and Fade controls not visible on Photo Tool InfoBar with some languages. Fixed. • Serious error possible if font warnings are shown during program startup. Fixed. • Serious error possible selecting inside photos with effects. Fixed.New Content (14 Nov 2023)
What’s New 14th November There’s also a significant boost to our content library to coincide with 23.5. You can find all this great new content in Xara Elements (formerly Online Content Catalog) and the Designs Gallery under Modular Websites: • 5 new Website Templates created with the new Flexible Web Blocks • A new block category Web Blocks > Section Headings with 19 new blocks • A new block category Web Blocks > Sliders with 2 blocks (more coming soon) • 20 new Web Blocks > Hero blocks in addition the existing blocks have been updated to take advantage of the new Flexible Web Block functionality: • 306 blocks have been updated to Flexible Blocks • 29 Website Templates have been updated to Flexible Blocks Last but definitely not least there is a new Introduction to Blocks 2 document in First Look > Introduction. New content includes 5 all-new websites created with the new Flexible Web Blocks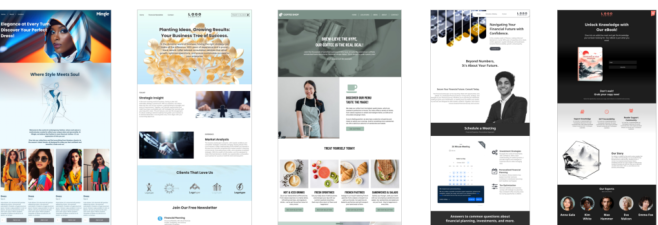
Page 56
Last updated February 25, 2025
Version 23.5.1 (21 Nov 2023)
Web fixes
• Web export failed due to very long image filenames. Fixed. • Anchor links sometimes scroll to incorrect position. Fixed. • Ordering changes made to a Flexible Web Block are not reflected in the other variant if there are embedded objects included. Fixed. • Copy/paste of a Web Block can corrupt links to pages. Fixed. • Some Web Blocks in the Designs Gallery have text as images in web export. Fixed in live Designs Gallery. • Links to popup layers not working. Fixed.Version 23.6 (18 Jan 2024)
Web Blocks
Resize on live-share
When new objects are live shared across all variants of a Responsive Website, each copy created now gets reduced in width so that it will be no wider than the page in each variant. So for example objects created and shared in the Main variant will be reduced in width in the Mobile variant, if they would otherwise be wider than the Mobile page. When this is done, photos are reduced in size without cropping them, so the image looks the same in all variants. But text columns, text panels, etc. are reduced in width only, so the text font size will not be reduced. In the example below the green photo, which is the full width of the Main variant page, was added to a Web Block in the Main variant. In the Mobile variant, the photo is automatically resized so it’s no wider than the Mobile page width.
Page 57
Last updated February 25, 2025
Other Web Block Improvements & Fixes
• Info popup sometimes appearing incorrectly when adding new objects. Fixed. • Objects on top of Web Blocks are too easily added to the Block accidentally. Fixed. • Can’t select placeholder object if it’s the only object in a Web Block. Fixed. • Margin settings could be lost from Web Blocks. Fixed. • Problem with shadow added to object in flexible Web Block. Fixed. • Objects could change dimensions when moved between Web Blocks. Fixed. • Flex Layout toolbar appears when switching to any website document. Fixed - it now appears only when switching to a Modular website.Publishing of stylistic changes to websites
Many users reported that when they change some stylistic aspects of their website and re-publish, not all visitors to the updated site see the changes immediately without having to press Refresh in their browsers. This is now fixed so that all visitors to the updated site will always see the updated version immediately.Web Publishing Improvements
• Problem publishing filename with space in the name. Fixed. • Problem updating website with Web Designer+, if it was published with an older Magix version. Fixed. • Support for Internet Explorer discontinued. This means websites no longer need to include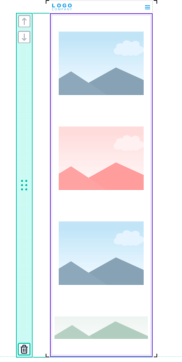
Green photo resized to fit in Mobile Variant
Page 58
Last updated February 25, 2025
additional legacy files that were required only for this old, unsupported browser.
•
Now easier to enable FTP logging/tracing to help solve FTP publishing problems. Press
Ctrl+Alt+Shift+3 to toggle on and off.
Italian Support
Web Designer+ now supports Italian, in addition to the German, Dutch, Spanish and French languages already supported. When starting the application for the first time on a device, it will use the current language as defined in Windows. Thereafter you can change the language at any time using Help > Language (requires an application restart).Text Improvements
Google Fonts Update
The set of Google fonts has been updated, adding around 350 new fonts, as listed below. A ADLaM Display,AR One Sans,Aboreto,Abyssinica SIL,Afacad,Agbalumo,Agdasima,Akatab,Akshar,Albert Sans,Alexandria,Alkalami,Alkatra,Allison,Alumni Sans,Alumni Sans Collegiate One,Alumni Sans Inline One,Alumni Sans Pinstripe,Andada Pro,Anek Latin,Angkor,Anuphan,Anybody,Aoboshi One,Are You Serious,Aref Ruqaa Ink,Arima,Atkinson Hyperlegible,Azeret Mono B BIZ UDGothic,BIZ UDMincho,BIZ UDPGothic,BIZ UDPMincho,Babylonica,Bacasime Antique,Bagel Fat One,Bakbak One,Battambang,Bayon,Beau Rivage,Belanosima,Besley,BhuTuka Expanded One,Birthstone,Birthstone Bounce,Blaka,Blaka Hollow,Blaka Ink,Bokor,Bonheur Royale,Borel,Braah One,Bricolage Grotesque,Bruno Ace,Bruno Ace SC,Bungee Spice C Cairo Play,Caprasimo,Caramel,Carattere,Carlito,Castoro Titling,Charis SIL,Cherish,Cherry Bomb One,Chivo Mono,Chokokutai,Climate Crisis,Comforter,Comforter Brush,Comme,Corinthia D Dai Banna SIL,Dangrek,Darumadrop One,Delicious Handrawn,Diphylleia,Dongle,DynaPuff E Edu NSW ACT Foundation,Edu QLD Beginner,Edu SA Beginner,Edu TAS Beginner,Edu VIC WA NT Beginner,Ephesis,Estonia,Explora F Familjen Grotesk,Fasthand,Figtree,Finlandica,Fleur De Leah,Flow Block,Flow Circular,Flow Rounded,Foldit,Fragment Mono,Fredoka,Freehand,Fuzzy Bubbles G Gabarito,Gajraj One,Gantari,Gasoek One,Gemunu Libre,Genos,Gentium Book Plus,Gentium Plus,Geologica,Georama,Gideon
Page 59
Last updated February 25, 2025
Roman,Gloock,Glory,Gluten,Golos Text,Gowun Batang,Gowun Dodum,Grandiflora One,Grape Nuts,Grechen Fuemen,Grey
Qo,Gulzar,Gwendolyn
H
Hahmlet,Handjet,Hanken Grotesk,Hanuman,Hedvig Letters Sans,Hedvig Letters Serif,Hina Mincho,Hubballi,Hurricane
I
IBM Plex Sans Arabic,IBM Plex Sans Devanagari,IBM Plex Sans Hebrew,IBM Plex Sans JP,IBM Plex Sans KR,IBM Plex Sans Thai,IBM Plex
Sans Thai Looped,Imperial Script,Inclusive Sans,Ingrid Darling,Inspiration,Instrument Sans,Instrument Serif,Inter Tight,Island Moments
J
Joan,Kablammo
K
Kaisei Decol,Kaisei HarunoUmi,Kaisei Opti,Kaisei Tokumin,Kalnia,Kantumruy Pro,Kay Pho Du,Kdam Thmor Pro,Kings,Klee One,Koh
Santepheap,Kolker Brush,Konkhmer Sleokchher,Koulen
L
Labrada,Lavishly Yours,League Gothic,League Spartan,Libre Bodoni,Licorice,Linefont,Lisu Bosa,Love
Light,Lugrasimo,Lumanosimo,Lunasima,Luxurious Roman,Luxurious Script
M
M PLUS 1,M PLUS 1 Code,M PLUS 2,M PLUS Code Latin,Marhey,Martian Mono,Material Icons,Material Icons Outlined,Material Icons
Round,Material Icons Sharp,Material Icons Two Tone,Material Symbols Outlined,Material Symbols Rounded,Material Symbols
Sharp,Mea Culpa,Meow Script,Metal,Mingzat,Mochiy Pop One,Mochiy Pop P One,Mohave,Moirai One,Monomaniac One,Montagu
Slab,MonteCarlo,Moo Lah Lah,Mooli,Moon Dance,Moul,Moulpali,Ms Madi,Murecho,My Soul,Mynerve
N
Nabla,Narnoor,Neonderthaw,Nokora,Noto Music,Noto Sans Display,Noto Sans Gothic,Noto Sans Mono,Noto Sans SignWriting,Noto
Sans Symbols,Noto Sans Symbols 2,Noto Serif Display,Nuosu SIL
O
Odor Mean Chey,Ole,Onest,Oooh Baby,Orbit,Outfit
P
Padyakke Expanded One,Palette Mosaic,Passions Conflict,Pathway Extreme,Petemoss,Phudu,Pixelify Sans,Playfair,Playpen Sans,Plus
Jakarta Sans,Poltawski Nowy,Praise,Preahvihear,Puppies Play
Q
Qwitcher Grypen
R
REM,Radio Canada,Rampart One,Readex Pro, Red Hat Mono,Redacted,Redacted Script,Rethink Sans,Road Rage,Roboto Flex,Roboto
Serif,Rock 3D,Rubik 80s Fade,Rubik Beastly,Rubik Broken Fax,Rubik Bubbles,Rubik Burned,Rubik Dirt,Rubik Distressed,Rubik Doodle
Shadow,Rubik Doodle Triangles,Rubik Gemstones,Rubik Glitch,Rubik Iso,Rubik Lines,Rubik Maps,Rubik Marker Hatch,Rubik
Page 60
Last updated February 25, 2025
Maze,Rubik Microbe,Rubik Moonrocks,Rubik Pixels,Rubik Puddles,Rubik Scribble,Rubik Spray Paint,Rubik Storm,Rubik Vinyl,Rubik Wet
Paint,Ruwudu
S
STIX Two Text,Sassy Frass,Scheherazade New,Schibsted Grotesk,Send Flowers,Shalimar,Shantell Sans,Shippori Antique,Shippori
Antique B1,Shizuru,Sigmar,Silkscreen,Slackside One,Smooch,Smooch Sans,Sofia Sans,Sofia Sans Condensed,Sofia Sans Extra
Condensed,Sofia Sans Semi Condensed,Solitreo,Sometype Mono,Sono,Source Sans 3,Source Serif 4,Splash,Spline Sans,Spline Sans
Mono,Square Peg,Stick No Bills,Style Script,Suwannaphum
T
Tai Heritage Pro,Tapestry,Taprom,Tektur,The Nautigal,Tilt Neon,Tilt Prism,Tilt Warp,Tsukimi Rounded,Twinkle Star
U
Unbounded,Updock,Urbanist
V
Vazirmatn,Victor Mono,Vina Sans,Vujahday Script
W
Water Brush,Waterfall,Wavefont,Whisper,WindSong,Wix Madefor Display,Wix Madefor Text
Y
Yaldevi,Young Serif,Ysabeau,Ysabeau Infant,Ysabeau Office,Ysabeau SC
Z
Zen Antique,Zen Antique Soft,Zen Kaku Gothic Antique,Zen Kaku Gothic New,Zen Kurenaido,Zen Maru Gothic
Other Text Improvements
• Can’t edit SmartField value if it’s in a Repeating Object. Fixed. • Graphical numbered lists: numbers not updated when first pasting a graphical number to the list. Fixed.Other Fixes & Improvements
PDF Import
• Some PDFs with ICC based images failed to import properly. Fixed.Bitmap Export Dialog
• Zoom tool no longer working. Fixed. • Transparent option now always enabled and it automatically selects True Color + Alpha for the export when activated.
Page 61
Last updated February 25, 2025
Other
• Stacking order changes not working properly with multi-selection. Fixed. • SmartShape unexpectedly removed from document after intersect operation. Fixed. • Help > Check for updates doesn’t always report when the program is up to date. Fixed. • File extension registration messages now clearer, when shown on program startup.New Content (18 Jan 2024)
We’ve added another very significant boost to the web block and website templates, to give you an almost infinite variety of designs to inspire your new site. You can find all this great new content in Xara Elements (formerly Online Content Catalog) and the Designs Gallery under Modular Websites: • 5 new Website Templates created with Web Blocks in Modular Websites > Website Templates • 280+ new Web Blocks in Modular Websites > Web Blocks Design the perfect fit for your brand with our fully customizable web templates TIP: Check out our Modular Websites playlist for help on making the most of Web Blocks and Modular sites, and don’t forget there’s also a new Introduction to Blocks 2 document in the Designs Gallery First Look > Introduction. The WebBlocks PlaylistValentines Day (7 Feb 2024)
Spread a little joy this Valentine’s Day - with a bit of help from our new Valentine themed social media templates!


Page 62
Last updated February 25, 2025
•
25 Facebook posts
•
25 Instagram posts
You can find all this Lovely new content in Xara Elements (formerly Online Content Catalog) and the
Designs Gallery in the Social Media folder.
Valentine’s Day sorted on Instagram and Facebook
Version 23.7 (21 Feb 2024)
Web Blocks
Live Dragging
Now when you resize an object within a Web Block using the objects resize handles, the Block updates live as you drag. Previously only the object you were editing would update and the Block layout would only
Page 63
Last updated February 25, 2025
update at the end of the drag. This makes it much easier to adjust the sizes of objects in a Web Block
because you can see the results as you drag.
Similarly when you drag on the bottom edge of a selected Web Block to change its height, you now get live
feedback showing the effects of the height change as you drag.
Save Web Block
You can now export individual Web Blocks from your Modular Website, to make them easily re-usable in other websites. Select the Block you want to save by clicking on the green Web Block bar. Then right-click and choose Export > Export … from the context menu. Choose the .web format (or .xar if you are in Designer Pro+) and choose a filename and location. The next prompt asks if you want to export the whole page, or just the selection. Choose the selection option, to export just the selected Web Block. You can then import the .xar/.web file into any other website project.Web Blocks in Freeform Websites
A Freeform website is any website project that was constructed using individually placed objects, as opposed to a Modular website that is built only from Web Blocks. Now when you add a Web Block to a Freeform website, it gets converted into ordinary groups, one group in each variant. This makes it easier to work with the contents of the Block in a Freeform site, since it avoids having a mixture of Web Blocks and other objects on the same page. For the same reasons, any existing Web Blocks in a freeform website are automatically converted to groups when the website project is opened. A warning is shown on open if any Web Blocks have been converted.Other Web Block Improvements
• Changing height of a Web Block changes height of all objects inside. Fixed. • Layout of Flexible Web Blocks could change unexpectedly with minor text or text style changes. Fixed. • Copy/pasting Web Block could change the Site Navigation Bar. Fixed. • Can’t change z-order of a group inside a Web Block. Fixed.Changing the height on a text column
Text columns have a fixed width into which text is formatted, but unlike a Text Area (text box) they do not have a fixed height. This could be confusing for users, because dragging the top/bottom height handles in the Selection Tool did nothing. Now upon dragging these handles on a column, the user is asked if they would like to convert the Text column into a Text Area, so they can then adjust the height.
Page 64
Last updated February 25, 2025
Web Publishing Improvements
Improved Error Reports
If you encounter errors when publishing to your chosen web hosting provider, Web Designer + will now provide more comprehensive information about the error along with suggestions on how to resolve it. The error workflow has also been improved, so that you can jump straight back to the Settings dialog and after making changes you can retry the publish directly from the Settings dialog.Other Web Improvements
• First time publishing user experience is now smoother and simpler • Publishing details are now always saved in the document (the option to control this has been removed). • When publishing with FTP, the password is now automatically saved in the project file by default (but this can still be turned off in the Publish dialog). • Xara Hosting users are now kept signed in by default. • Improved handling of port number in FTP settings. Port number is automatically extracted from the server address, if included, and set correctly. • Option to view FTP password.Import/Export Improvements
• PDF Import: Some PDFs with form fields did not import. Fixed. • PDF Import: Non 8-bpp images could import solid black from some PDFs. Fixed. • Web export: PDFs with a “+” in their filenames were not linked to website correctly. Fixed.Other Fixes & Improvements
• Improved error reporting on program activation failure. • Widget maximum height increased, to allow for very long form widgets. • Serious error copy/pasting page from one document to another. Fixed.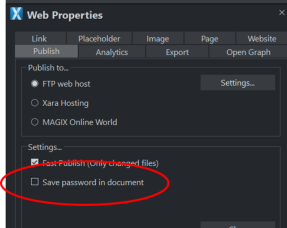
Page 65
Last updated February 25, 2025
•
Project file very slow to open/save/publish. Fixed.
•
Replacements of a repeating logo/symbol did not always replace all copies. Fixed.
•
Tables: Serious error when setting padding to 0 on some tables. Fixed.
Spring Content (26 March 2024)
Spring is arriving in the North, and there’s no better time to freshen up your content. To help with the spring clean we’ve added 440+ new Spring and Easter themed templates, photo clipart and illustrations for social media and web design to Xara Elements (formerly Online Content Catalog) and the Designs Gallery, in the following folders: 11 Easter Facebook templates: Social Media > Facebook 11 Easter Instagram templates: Social Media > Instagram 31 Easter Illustrations: Components > Image Resources> Illustrations 60 Easter Clipart: Components > Image Resources > Photo Clipart 160 Spring Photo Cliparts: Components > Image Resources > Photo Clipart 169 Spring Backgrounds: Components > Image Resources > BackgroundsVersion 23.8 (3 Apr 2024)
Mold Tool - Replace Image
Replacing images inside molds can now be done directly by right-clicking on the Mold and choosing the new Replace photo option.


Page 66
Last updated February 25, 2025
Tables
• When in the Table Tool, clicking on an object embedded in the table now selects the table cell instead of the object. This improves consistency - now in all cases clicking in a table will select the table cell. • We’ve streamlined deleting multiple rows or columns. Now when you select multiple rows or columns you’ll see a single delete handle (gray cross in red circle), and a single delete action will delete all the columns/rows highlighted with the red header: • Cutting table row goes wrong in heavily merged table. Fixed. • Unexpected column widths when adding or pasting rows. Fixed. • Internal error when cutting cells in some table designs. Fixed.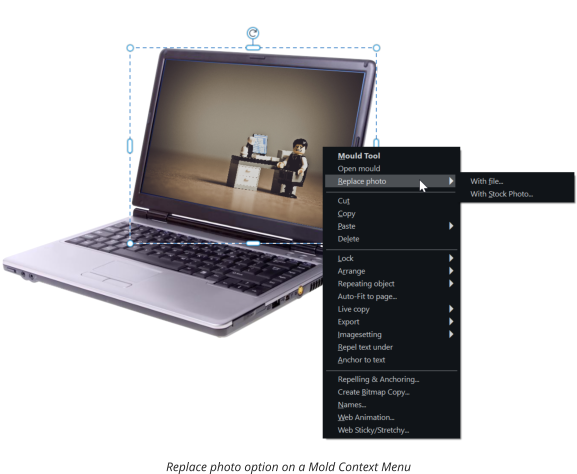
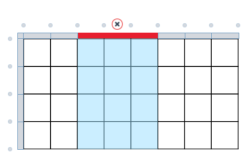
Page 67
Last updated February 25, 2025
Web Export
• New - Modular Website Tutorials, to help you get started building modular websites from Web Blocks. See Help > Modular website tutorials. • The option for an image to fill the browser window doesn’t work until the document is saved. Fixed. • When navigating from page to page, where each page has a button in the same position under the mouse pointer, it was necessary to move the mouse a little before the button would become clickable. Fixed. • Very quickly moving an object out of a Flexible Web Block could result in the object disappearing. Fixed. • Page deletes and page re-orders now warn if they result in the first page of a website not being called “index”. • Status bar messages improved when dragging objects over Blocks. • Can’t change the height of blocks containing text columns. Fixed. • New Blocks are now inserted behind any floating objects and on top of all existing Blocks. • FTP dialog layout improvements. • Applying shadow to text changed Flexible Web Block layout unexpectedly. Fixed. • Other Web Block fixes.Other Fixes & Improvements
• Display of CMYK JPEGs with a color profile incorrect. Fixed. • Selection wrong after making a single object repeating. Fixed. • Serious error on deletion of a presentation step, in presentation document with ‘All layers the same’ turned on. Fixed. • Logging improvements to aid problem resolution, for Designer+ Activation and FTP Publishing. • PDF import: PDF file would not open. Fixed. • Italian translation improvements.Photo Mockups (4 April 2024)
We’ve added a brand new Mockups template category that can add a whole new dimension to your design practice. You can find more than 130 examples in Xara Elements > Components > Image Resources > Photo Mockups. Mockups serve as visual prototypes, allowing designers to showcase their ideas in a realistic context before finalizing a product. Whether it's presenting a website design, an app interface, or branding materials, mockups offer a realistic preview, aiding in client presentations, feedback gathering, and overall design refinement.
Page 68
Last updated February 25, 2025
Images within the mockups can be replaced with a simple drag & drop (or right click > replace photo), and
the mockups themselves can be edited.
We have added 137 Mockups in 7 categories:
•
8 Book
•
36 Devices
•
28 Frames
•
13 Mug & Cup
•
29 Outdoor
•
5 Packaging
•
26 Stationery
Just a few examples using some of the Frame, Device and Packaging Mockups
The options are almost endless but check out many more examples, and tips on how to use and edit the
new mockup templates on xaratemplates.com.

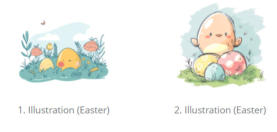

Page 69
Last updated February 25, 2025
Version 24.0 (9 May 2024)
Website Improvements
Video Backgrounds
Video backgrounds can be a great way to add visual impact to your website, reinforce your brand, add additional messaging and increase engagement. And if they increase visit time and reduce bounce rate they can be great for your SEO too! Which is why in v24 we’ve introduced Web Blocks with video backgrounds and video website backgrounds.Web Blocks with Video Backgrounds
Elements and the Designs Gallery now include a selection of Web Blocks with video backgrounds. In the following example the video is behind a clipping shape. Click on the video background object to select it and a context menu appears, with a Replace video option. This allows you to replace the video with your own video file. Whenever you replace the video, both the Main and Mobile variants are updated with the new video. You can find video background Web Blocks in the Designs Gallery in these folders: Modular Websites > Web Blocks > Blank Modular Websites > Web Blocks > Hero Modular Websites > Website Templates > Business
Video Background object selected, Replace video option shown
Page 70
Last updated February 25, 2025
Website Video Backgrounds
These videos show behind all the other content of your website, filling the full width of the browser window. There’s now a wide selection of these backgrounds you can choose from in the Designs Gallery under Modular Websites > Styles > Page Background > Video. After inserting one of the backgrounds you will see a video placeholder at the top of the page, behind the page content. Preview the page to see the video playing behind your content. Using your own video To use your own video as a background, you first need to insert one of the Designs Gallery videos. The video background object resides on the Pasteboard background layer of your website, which is normally locked. So if you want to replace the video with your own, you first need to unlock this layer using the Page & Layer Gallery. Just toggle the lock icon for this layer. Once you’ve done that you can click on the video object to select it, which brings up a menu with a Replace video option. It’s best to re-lock the layer once you’ve replaced the video. Removing from Mobile variant If you wish to remove the video background from the mobile variant: • Select the mobile variant. • Right-click on the video placeholder and select from the context menu: Website variants > Stop sharing with variants • Right-click again on the video placeholder and select from the context menu: Web Properties... > Placeholder > Show selected object(s) unchanged > Ok.Photo Filters in Web Blocks
You can now use any of the many Photo Filters in Designer+ on images in Web Blocks. To apply a filter, right-click on an image and choose the Photo filter > Apply photo filter option from the context menu. This opens the Designs Gallery showing a wide selection of filter effects. When you apply a filter to a photo in one variant, it’s also applied automatically in the other variant(s). To remove a filter, again right-click on the image and use the options in the context menu under Photo filter. Some of the Web Blocks in the Designs Gallery already have filters applied, including some in: Modular Websites > Web Blocks > Hero Modular Websites > Website Templates > BusinessWeb Export Fixes & Improvements
• The main (index) page of a website now has its canonical link set to the domain name without the
Page 71
Last updated February 25, 2025
index.html included. For example http://www.example.com instead of
http://www.example.com/index.html. Generally this is better for SEO.
•
FTP/publish passwords are now saved in the project file by default, for new projects.
•
The shortcut for turning on FTP/publishing logging is now Alt+Ctrl+Shift+4 (the previous shortcut
(Alt+Ctrl+Shift+3) can clash with a Microsoft function).
•
Image goes missing from very long web page. Fixed.
•
Can’t apply a second color selection point in Color Selection tool. Fixed.
•
Photos could go missing from Mobile variant after rapid changes in Main variant. Fixed.
•
Adjusting the crop of a photo in a Web Block changes the Block height. Fixed.
•
Sticky images have incorrect scale when exported as full width in a scale-to-fit website. Fixed.
•
Internal error opening website project due to problem widget. Fixed.
•
Error when attempting to link a NavBar button to an external file such as a PDF. Fixed. (24.0.1)
•
Error publishing to a folder path that has a leading "/". Fixed. (24.0.1)
Embedded Files
In previous versions of Web Designer, when you add an external file such as a video, animated GIF or linked PDF to your website, the file was placed into a folder alongside the .xar file. For example myProject.xar would have a folder myProject_xar_files alongside it, containing the referenced files. Now these files are saved embedded inside your project .xar file instead, meaning they can never get lost if the project file is copied or moved without its accompanying folder. Each file is linked to the placeholder object that references it. So for example when you add a video, the video player placeholder object is linked to the video file that is embedded in your project. If you delete the placeholder, the referenced file is deleted from the project too. Therefore it’s important that you always keep separate copies of the files that you add to any project, in case the object referencing the file, or the whole xar file, gets deleted. The Video Backgrounds described above embed the video files into your project using this mechanism.Existing projects with referenced files
For existing projects that already have their referenced files in a folder next to the .xar file rather than embedded, these will continue to work as before. You may choose to re-import those files to have them embedded in the xar file instead, if you would like to eliminate the need for the folder. If you do this, note that some of the files in the folder are part of the video player and so you won’t need to import those - they will be automatically added as embedded files when you just re-import your video file. IMPORTANT: Before you delete the folder, please take a backup copy of it in case you later find that it contains important files that you have not embedded in your project!
Page 72
Last updated February 25, 2025
More QuickShapes
The QuickShape Tool flyout bar has been extended to include a wider selection of preset shapes. Just select the shape you would like and then click-drag to draw the shape. Then you can change the various options on the QuickShape Tool InfoBar as usual.Color Picker Shortcut
The eye dropper tool (available on the color line and in the color editor) is used to copy a color from under the mouse pointer onto the current selection. There is now also a shortcut key for doing this without having to go into the eye dropper tool - simply hold down the \ (backslash) key on your keyboard. As you move the mouse pointer around with this key held down, the current selection receives the color that is directly under the mouse pointer. Note you can use this within the Web Designer+ window, or to sample colors from any other window or from your desktop.AVIF Import
Web Designer+ can now open and import AVIF files. These will typically have an avf or avfs file extension. AVIF is an open image file format, typically used for photos as an alternative to JPEG.PDF Improvements
• PDF Import: Some PDFs containing forms failed to open. Fixed. • PDF Import: Text wrapping wrong for text on the last page of a form. Fixed. • PDF Import: Serious error when importing certain PDF files. Fixed.Web Content (9 May 2024)
In addition to the new video background templates, you’ll find a whole host of new creative choices in Elements (formerly Online Content Catalog) and the Designs Gallery: • 11 Web Templates in Modular Websites > Website Templates > Business • 350+ New Web Blocks in Modular Websites > Website Templates > Business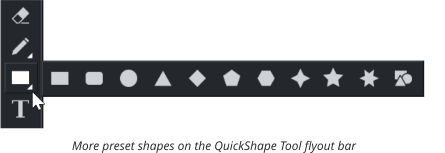

Page 73
Last updated February 25, 2025
•
14 New Web Blocks in Modular Websites > Web Blocks (2 Blank, 12 Hero)
You can see more info and previews on XaraTemplates.com
Graphic Assets (27 May 2024)
Out latest Elements update is focused on icons and other assorted vector graphics, plus there’s a huge new selection of photo clipart and bitmap backgrounds. So if you’re looking for anything from fun icons in a hand drawn style to the perfect presentation background, seek inspiration in the Designs Gallery now! • 421 Icons in Components > Print & Web Components > Icons • 123 Vector Graphics in Components > Print & Web Components > Graphics • 1500 Bitmap Backgrounds in Components > Image Resources > Backgrounds • 2136 Photo Clipart in Components > Image Resources > Photo Clipart More info and examples on XaraTemplates.com.Version 24.1 (2 July 2024)
Sliders
Sliders can provide a great way to showcase key information on your website in a compact and visually attractive way; from products and portfolios to reviews, promos, events, news or awards. Say hello to Sliders: https://youtu.be/Lt33nkoKlss How to use sliders in your website: https://youtu.be/jpR1ZB4BQ8Y Xara’s new sliders can be used to create simple photo sliders or much richer sliders that can have almost any content displayed on each slide, including links and CTAs. These sliders replace and improve upon the old online slider widget, which is no longer available in Elements, although it will continue working in websites where you’ve used it already.


Page 74
Last updated February 25, 2025
You’ll find a wide selection of new pre-designed Xara Sliders in Elements, in the following folders.
For Modular Websites:
Modular Websites > Web Blocks > Blank
Modular Websites > Web Blocks > Sliders
For Freeform Websites:
Components > Image Resources > Sliders
A Slider consists of two or more individual slides, where only one slide at a time is visible. In your website
each slide is shown in turn, cycling through all the slides and then starting again with the first slide. You can
have different animations on the slides and even on different objects on each slide, to create great visual
effects on your website.
Editing Sliders
Click on a slider to select it and the Slider Menu Bar appears.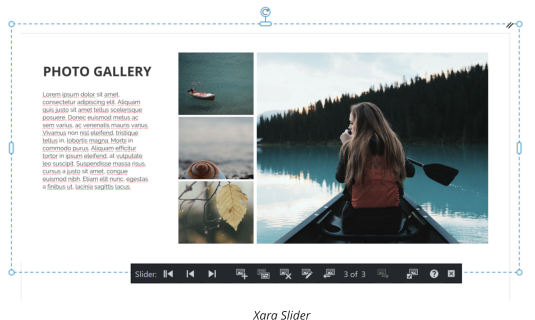
Page 75
Last updated February 25, 2025
You can edit the objects of the current visible slide directly. For example, go into the Text Tool and click on
text to edit it. Go into the Photo Tool and click on a photo to select it, or right click and choose the Replace
photo … option to change the photo. You can also Ctrl+click or Alt+click on objects to select them inside
the current slide, to delete them, move them, etc.
Navigating through the slides
Use the first 3 buttons on the Slider Menu Bar to navigate through the slides in the Slider, making each
slide in turn current so you can edit their contents.
Adding new photos
To quickly add one or more photos to the Slider, use the Add photos button and browse for your photo
files (use Ctrl+click and Shift+click in the file window, to select multiple files). A new slide is added for
each photo you select.
Duplicate slide
Some Sliders have several different slide designs and layouts. If you want to add a new slide that has the
same design as an existing slide, make that slide current and click the Duplicate slide button. The new
slide becomes the current slide so you can then change its contents.
Changing slide order
The X of Y label shown on the Slider Menu Bar shows you how many slides you have in total in your Slider
and which slide is currently shown. The buttons either side of this label let you change the order of your
slides, by moving slides earlier or later.
Editing inside a slide
The Edit slide button opens a new view onto the current slide, so you can edit its contents. If you want to
add objects to a slide, this is the best way to do it as you can then just draw, insert or paste objects directly
into the slide. Just Ctrl+S to save when you have finished working on the slide, to return to your project
view. Or you can close the slide view using the close button on the view window and then save or discard
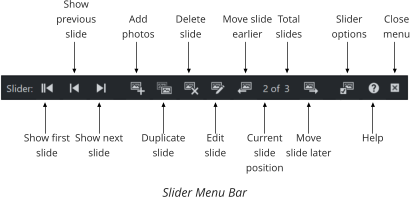
Page 76
Last updated February 25, 2025
changes at the prompt.
Double-clicking on the Slider also opens the current slide for editing, the same action as the Edit slide
button.
Slider Options
Press the Slider Options button to bring up the Slider Options Dialog (later additions to this dialog are described in v24.2 notes below). Slide duration Choose how long (in seconds) you’d like each slide to display, before the next slide appears. Transition effects Here you can choose from a range of animation effects, which are used when transitioning from one slide to the next. Note that setting the effect here will apply that effect to ALL objects on EVERY slide. That’s fine for simple sliders, but some sliders are designed to have different effects on different objects of a slide. For example, slide in the main photo, but then fade in its caption. Setting the effect in the Slider Options dialog will override these different effects. The Duration setting lets you set the speed of the transition effect - reduce the time for faster effects. You can put different effects onto different objects of your slides using the Web Animation dialog, which is the same dialog used for applying Reveal effects to any objects in your website. Right-click on the object and choose Web animation … from the context menu, then select the Reveal/scroll tab. Use only the Reveal effects (scroll effects won’t work in a slider). You can also set the speed and even a delay so that objects on a slide appear at different times.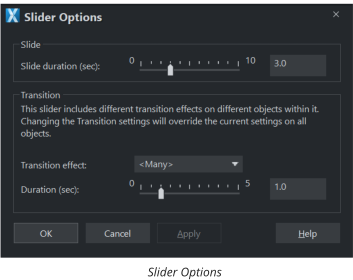
Page 77
Last updated February 25, 2025
Sliders and Variants
When you are using Sliders in Modular Websites they are used inside Web Blocks, just like all other content of the website. And since Web Blocks are shared across variants, the Slider will appear in all variants too, so any content changes you make to a Slider in one variant will also be applied in the other. In Freeform websites, you can manually share Sliders just as you share other objects (right-click on them and select Website variants > Share with other variants …). Sharing of Sliders across variants works a little differently to sharing other objects. You can change the font size on text in each variant independently, so you can have different text sizes in different variants. However this only works when you have a single font size in each text object in the Slider, not if you have mixed font sizes in the same text area/column object. As when sharing other types of object, any transformation-only changes apply only in the variant where you do the transformations. So for example you can change the aspect ratio of a Slider in the Mobile variant if you want, without affecting the Main variant.Embedded objects in text
Currently embedding objects into text on a slide won’t work as expected, so avoid using embedded objects in Sliders.Making your own sliders
To make your own Sliders, start with one of the Slider designs in Elements and then modify it as described above. Master Slides (Advanced) Some Sliders include a Master Slide which is not shown in your exported website, it’s there for Slider editing purposes only. Whenever you use the Add photo function to add more photos to your Slider, a new slide is created for each new photo by making a copy of the Master Slide. So the Master Slide determines the design and layout of the new slides. If there is no Master Slide in the Slider, then the first slide is used by Add Photo instead. If you expand a Slider in the Page & Layer Gallery, you can see that each slide is a separate child of a Slider Group. Each child can be a single object, such as a photo, or a Group of objects. The Master Slide is usually the last child of the Slider Group. You can make it visible and editable on the page by toggling its visibility ON in the Page & Layer Gallery. You’ll also need to turn off the current visible slide, by toggling its visibility icon too. Once you can see the Master Slide on the page, then you can use the Edit function on the Menu Bar to edit the contents of the Master Slide. Note that to identify the Master Slide and distinguish it from the other slides, the special name tag
Page 78
Last updated February 25, 2025
type:slider:master is applied to it.
Stroke Settings
There’s a new Stroke Settings control on the top bar, just before the existing control for setting the line width. This enables quick and easy customization of the attributes of a stroke (the outline or path that defines the shape of graphic elements such as a lines, curves or borders) and includes some new Stroke controls. The new control shows an approximate representation of the stroke settings that are on the current selection. Clicking on it brings up the following stroke settings, some of which are new to Designer+ in this update. These new Stroke Setting controls also now appear at the top of the Line Gallery.Join Type
Choose between Miter, Round and Beveled joins between line segments. Note that when Stroke Alignment is set to Inside, changing join type has no visual effect.Miter Limit (NEW)
This is a new control that allows you to control how miter joins appear. Where line segments join at a sharp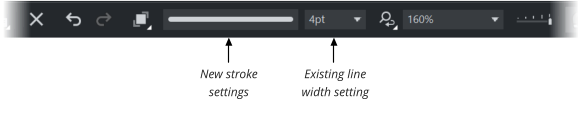
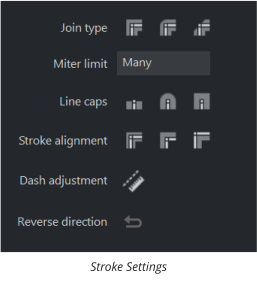
Page 79
Last updated February 25, 2025
angle, by changing the Miter limit you can control the point at which the join displays as beveled, to avoid
very long points on very sharp joins. The following example shows the same mitered join with different
Miter limit settings.
The Miter limit is applied as follows. The Miter joint projects outwards from the point where the two
strokes meet. If the length of that projection is less than N times the width of the strokes at the joint (where
N is the Miter limit), then a Miter is shown, otherwise a bevel is shown.
Line Caps
Choose between Butt, Round and Square line caps.Stroke Alignment (NEW)
In all previous versions of Designer, the stroke of a shape was always displayed centered on the shape’s outline. Now you have the option of having the stroke completely inside, or completely outside the shape outline too. The following examples show the same shape with the 3 different stroke settings. They are shown with 50% transparency applied, so that you can see the position of the stroke relative to the filled shape.Dash Adjustment (NEW)
This new option automatically adjusts the size of the dashes in a dashed stroke, so that they fit into the perimeter of a shape exactly. This avoids ugly cases where one of the dashes looks longer or shorter than all the others, at the shape outline join.

Page 80
Last updated February 25, 2025
Reverse Direction
Change the direction of a line. This is useful for lines with arrowheads and tails, and for brushed and variable width stroked lines.AVIF Export
AVIF import was added to Web Designer+ earlier this year, now we’ve added export too. This is available in the list of formats under File > Export.Web Fixes & Improvements
• Audio player preview image sometimes incorrect and cropped. Fixed. • File attachment not shared with other variants. Fixed. • Gradient on background shape not shown in Mobile view. Fixed. • Tune-Ups tab added to Utilities > Options dialog. Includes the option to reset application settings. • Links to *.jpeg files download the files instead of viewing in browser. Fixed, so these now behave the same as *.jpg files. • Inserted Web Blocks are positioned wrongly if there are unlocked page background objects. Fixed. • Dragging a shape out of a Web Block can cause the shape’s height to extend during the drag. Fixed. • Linked file is deleted from document after clicking Apply, then OK in Link dialog. Fixed.Other Fixes & Improvements
• Serious error on document load with some variants of Cascadia and Aptos fonts. Fixed. • Applying background color to selected table column applies it to whole table. Fixed.Slider Templates (12 July 2024)
We’ve just added a range of new slider designs to Elements / Designs Gallery so you can make the most of this great new feature. You’ll find them in the following folders. For Modular Websites (now 26 designs in total): 13 new sliders in Modular Websites > Web Blocks > Sliders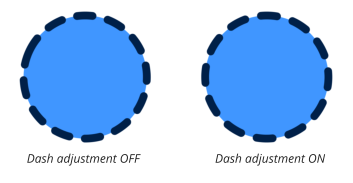
Page 81
Last updated February 25, 2025
For Freeform Websites (now 36 designs in total):
26 new sliders in Components > Image Resources > Sliders
Version 24.2 (22 July 2024)
Sliders
New Slider Options
Some additional options have been added to the Slider Options dialog to enhance our new Sliders feature. The new slider options: https://youtu.be/ZjEVB74TSwQ Navigation Controls Sliders now include the option to Show navigation controls, allowing visitors to your website to manually navigate through your slides. The controls appear whenever the mouse pointer is over the Slider. On touch devices, tapping the Slider shows the controls, tapping away hides them again.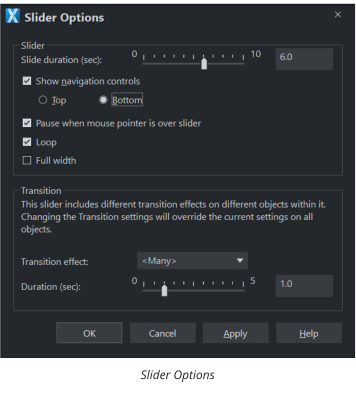
Page 82
Last updated February 25, 2025
The number of circles shown in the navigation bar matches the number of slides in your Slider. The visitor
can click on the circles to jump to a specific slide. You can choose to show the navigation bar at the top or
at the bottom of your slider, depending on what works best with your Slider content.
Pause
When this option is on, the Slider pauses whenever the mouse pointer is held over the slider. This allows
the visitor more time to read the slide contents and to interact with any buttons and links on a slide. On
touch devices, tap on the slider to pause and tap away to resume.
Loop
When this option is on, the Slider will start again showing the first slide, after it has shown the last slide,
looping continuously.
Full Width
When this option is on, any non-text objects that are 95% or more of the page width, are automatically
stretched to fill the full width of the browser window in your published website. So for example if you have
a Slider that is the full width of the page, with a photo on each slide, then the photos will be expanded
horizontally to fill the visitor’s browser window.
Note that this has the effect of cropping your images, so the wider the browser/screen, the more images
will be cropped. So make sure your images are suitable. Also it’s important the images are high enough
resolution so that they will still look good when scaled up to fill a wide screen. If your images are not
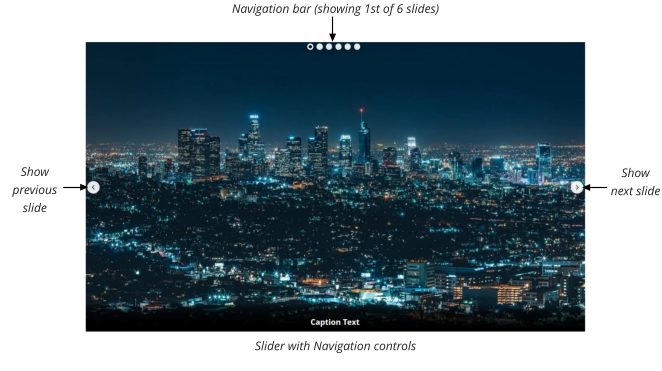
Page 83
Last updated February 25, 2025
suitable, it’s best to turn this option off.
Touch Support
As described above, the Navigation controls and Pause option work with touch devices too. In addition, touch users can navigate forwards and backwards through the slides by swiping left or right on the Slider.Other Slider Fixes & Improvements
• When you change Slider options in one variant, they are now also changed in other variants. • “Open link in” option is disabled in the Link dialog when editing a slide. Fixed. • Full width slider shows parts of a non-current slide in Edge browser. Fixed. • Add photo doesn’t work in single variant websites. Fixed. • Duplicate slide popup message now has “Don’t show again” option.Other Fixes & Improvements
• Serious error after importing PNG file. Fixed.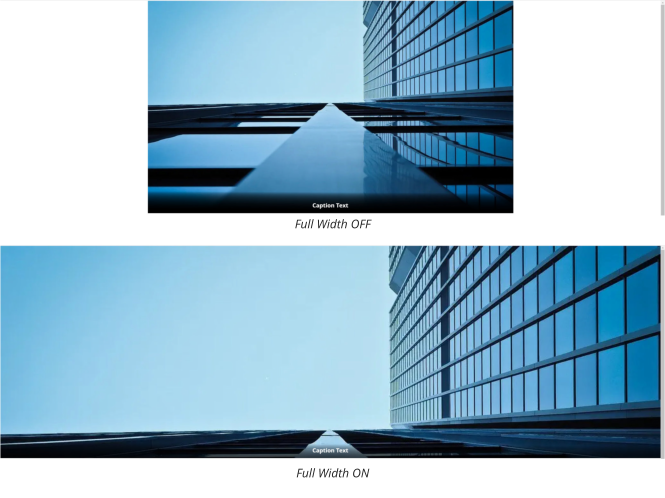
Page 84
Last updated February 25, 2025
•
Prompt offering to convert images to JPEG on import/paste removed.
•
Don’t allow background shape to be deleted from a Text Panel SmartShape.
•
Serious error adding custom folder of files to Designs Gallery. Fixed.
•
QuickShape Tool preset shapes not working after switching to ellipse mode. Fixed.
•
Straight line tool InfoBar dropdown controls black instead of white. Fixed.
•
Shapes with inner or outer strokes don’t appear in wireframe view. Fixed.
•
Attached files are not updated when file is re-linked. Fixed.
Version 24.2.1 (30 July 2024)
Web Fixes & Improvements
• Publishing errors when transferring certain files using FTPS with TLS1.3 or SFTP. Fixed. • Full width objects with a linear or circular fill were exported as tiled when set to scale. Fixed. • Changing the reveal animation for objects in full width sliders failed when using edit inside. Fixed. • 10px margin applied to slider navigation bar when show navigation controls are enabled. • Additional class names applied to text during HTML export.Web Templates (8th Aug 2024)
The 2024 template bonanza continues with 5 new modular websites (including sliders and 50 web blocks) and 20 new sliders for the classic freeform websites. You’ll find them in the following folders: Introducing the new websites and sliders: https://youtu.be/t0F4TZVIf24 For Modular Websites: 5 new websites in Modular Websites > Website Templates > Business For Freeform Websites: 20 new sliders in Components > Image Resources > Sliders For more information and examples check our latest article on xaratemplates.com
Page 85
Last updated February 25, 2025
New choices for your website design
Version 24.3 (2 Sept 2024)
Bookflip Page Transition Effect
The list of Transition Effects in the Utilities > Web Properties > Export tab now includes a cool new Bookflip effect. When documents are exported to web with this option, two pages of the document are shown at once, side by side. And as the viewer moves through the pages, they see a page-turning transition effect. Use imported PDFs or templates to create bookflips and add them to your website: https://www.youtube.com/watch?v=15O8qx-po6o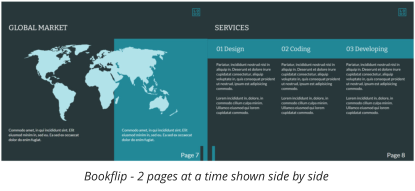

Page 86
Last updated February 25, 2025
Modular Websites & Web Blocks
Pasted/Inserted objects added to Web Blocks
Modular Websites are intended to be built entirely from Web Blocks, stacked one after another. So now whenever you add new objects to a Modular Website, by inserting them from the Insert Menu, from Elements, or from the Designs Gallery, the object is added to one of the Web Blocks in your website. If you have a Web Block selected (or something inside it selected), the new object is added to that Block. Otherwise the Block nearest the center of the view receives the new object. After you’ve added an object to a Block in this way, you can easily move the object to a different Block by dragging it, or drag it onto the canvas to the left or right of the page if you want to work on the object outside a Block. Once you’re done, you can drag the object back into any Web Block.Marquee selection inside a Web Block
Now you can select multiple objects inside a Web Block using marquee select. Go into the Selector Tool and click-drag to start a selection rectangle. All objects enclosed by the rectangle become selected. You can change how marquee selection works in Utilities > Options > General.Other Web Fixes & Improvements
• Dragging more than one object at once inside a Web Block doesn’t work as expected. Fixed. • Moving a floating object slightly, adds the object to the Web Block. Fixed. • Don’t allow ‘Export as single image’ on a Web Block. • Double rendering of an object when moving it inside a Block. Fixed. • Page shadow not working in Web Designer+. Fixed. • Menu on Mobile can open sub-menus on the wrong side. Fixed. • Animation type change on text object not propagated to other variant. Fixed. • Object fill color changes on moving it out of group into FlexGroup. Fixed.Other Improvements
• Tips of the Day have been updated and localized in all current language versions (English, German, Dutch, Spanish, French, Italian).New Marketing Templates (9 Sept 2024)
Out latest Xara Elements update adds many new professional-quality designs, catering to a wide range of industries. Fast track your marketing content with new templates in the following categories: • 4 presentations in > Presentations • 20 social media posts in > Social Media
Page 87
Last updated February 25, 2025
For more information and examples, check out xaratemplates.com.
Just some of the new marketing templates
Web Templates (3 Oct 2024)
The latest update to Xara Elements adds 5 new modular websites and 20 new sliders for the classic freeform websites. You’ll find them in the following folders: For Modular Websites: 5 new websites in Modular Websites > Website Templates > Business For Freeform Websites: 20 new sliders in Components > Image Resources > Sliders For more information and examples, check our latest post on xaratemplates.com
Page 88
Last updated February 25, 2025
New design choices for your website
Version 24.4 (9 Oct 2024)
OVHcloud Website Hosting
Xara recommends OVHcloud as a trusted web hosting provider and Web Designer+ has now been integrated with OVHcloud, so it’s easy to publish your website with them. What’s more, Xara users get a 20% discount on first time registration with OVHcloud’s popular Personal and Professional packages! Hosting packages are provided with a domain name, SSL security certificate , up to 500GB disc space and email accounts, providing you with everything you need to publish your Xara created website. Moving your website domain to OVHcloud is easy - see Moving your website. For more information see our OVHcloud knowledgebase article.How to Publish to OVHcloud
Select the new OVHcloud option in the Utilities > Web Properties > Publish tab. You will be asked if you
Page 89
Last updated February 25, 2025
already have an OVHcloud account - if not press the Register button and register for an account on the
OVHcloud website. Then return to Web Designer+ and press the Sign-in button. This opens your web
browser onto the OVHcloud website, so you can sign-in and give permission for Xara to access your
account. You can set the expiry time on this permission - it defaults to just 1 day but you can increase this
period so you don’t have to repeat this authorization step so often.
Once you’re granted authorization, return to Web Designer+. It should have established communication
with your OVHcloud account and show your settings.
The Service, Website and Username fields should be set for you automatically, but you may need to
change the selection in each of these dropdowns if your OVHcloud account has multiple Services, Websites
or Usernames for you to choose from.
Enter the Password you set in OVHcloud for the username selected, so Xara can publish to your account.
You don’t need to put anything in the Sub-folder field unless you want to publish to a sub-folder of your
website.
That’s it - you should now be able to publish your website using File > Publish … or the
button on the
top bar. If you have any problems, refer to the OVHcloud Help & Support page on the Xara website.
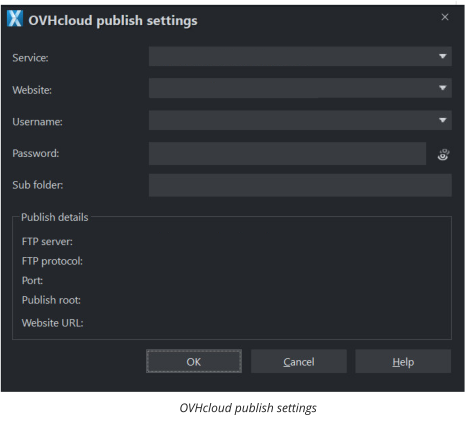

Page 90
Last updated February 25, 2025
Website Image Formats
AVIF Images
Web Designer+ now supports the option to have images in your website published as AVIF images. The AVIF format is generally superior to JPEG in that it can achieve better image quality at smaller image file sizes, so images can appear quicker for visitors to your website. However AVIF is not supported by some older Web browser versions. For this reason, the AVIF image option is not on by default in new or existing websites and documents. But you can enable it in the Utilities > Web Properties > Website tab.Choosing image format(s) for your website
With the addition of the AVIF option, Web Designer+ now offers you more control over which image format(s) you would like your website to use. See the new Images section on the Utilities > Web Properties > Website tab. Support for WebP images is now very widespread across all modern web browsers, and as with AVIF it generally gives smaller image file sizes for similar image quality compared to JPEG or PNG. So it’s no longer essential to also include PNG or JPEG images as fallbacks for the few older browsers that don’t support WebP. This can make your site preview and publish faster, because Designer+ doesn’t need to create images in multiple different formats. So for new documents and websites, Web Designer+ now defaults to including only WebP images, as shown in the screenshot above. This is also Xara’s recommended setting for all websites and web documents, given the current web browser landscape, so you may want to change the settings in your existing websites and documents to exclude JPEG & PNG. However if you want maximum browser compatibility, you can turn on the JPEG & PNG option instead, or in addition to, WebP or AVIF. Remember the more image formats you select, the longer it will take to preview and publish your website because Designer+ has to create and transfer more image files!Animated GIFs
Animated GIFs are now enabled in all types of document, not just website documents. So, for example, if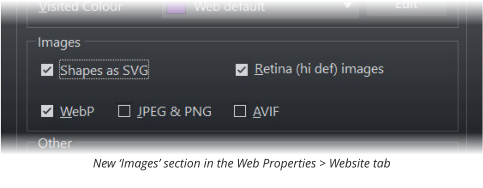
Page 91
Last updated February 25, 2025
you import a GIF into a print document and you publish a web version of that document the animated GIF
will work in the web browser. In PDFs only the first frame of the GIF will appear, as a static image.
Now when you import a GIF, the first frame of the GIF is used as the preview image shown in Designer+,
and the GIF is saved as part of your XAR project file.
Other Web Improvements & Fixes
• When an object is added to a Web Block, if it’s wider than the page it is automatically reduced in size so that it fits the page. • Insert > Web Block added to the Insert menu. • Users can now turn on manual page height resizing if desired, in Modular websites (File > Page Options …, Lock page size). This is disabled by default in Modular websites. • Locking the MouseOff layer in Modular websites caused unnecessary error alerts when opening projects and when importing Web Blocks. Fixed. • A Web Block could be partially imported if its variant sizes don’t match some variants, causing errors. Fixed. • Buttons sometimes not working in Xara Sliders, when navigation controls are enabled. Fixed. • The third level in bulleted lists could sometimes be missing in exported web pages. Fixed.Other Improvements & Fixes
• Xara news screen could appear larger than the device screen. Fixed. • PDF Import: Ligature characters sometimes missing from text. Fixed. • Some tips (in Tip of the Day) linked to wrong language versions. Fixed.Halloween (14 Oct 2024)
More than 600 new graphic assets to help make your Halloween as scary as possible! • 124 Backgrounds in Components > Image Resources > Backgrounds > Halloween • 231 Illustrations in Components > Image Resources > Illustrations > Halloween • 154 Photo Clipart in Components > Image Resources > Photo Clipart > Halloween • 121 Silhouette Graphics in Components > Print & Web Components > Silhouette > Halloween For more information and examples, check out Xaratemplates.com.
Page 92
Last updated February 25, 2025
Black Friday/ Cyber Monday (5 Nov 2024)
We’ve added over 200 new templates to the Designs Gallery to help you make the most of these top shopping days of the year: • 10 Facebook templates in Social Media > Facebook • 10 X (Twitter) templates in Social Media > Twitter • 10 Instagram templates in Social Media > Instagram • 100 Backgrounds in Components > Image Resources > Backgrounds > Black & Cyber • 100 Photo Clipart in Components > Image Resources > Photo Clipart > Text > Black Friday and Cyber Monday For more information and examples, check out Xaratemplates.comVersion 24.5 (2 Dec 2024)
Website Hosting
Xara Hosting & Magix Online World
The Xara Hosting and Magix Online World hosting solutions will soon be discontinued, so new users can no longer sign-up for these services. As a replacement, Xara recommends OVHcloud as a trusted web hosting provider. Web Designer+ is fully integrated with OVHcloud, so it’s super-easy to publish your website with this new solution, and we’ve negotiated a special price for Xara customers; get you discount code here. Moving your website domain to OVHcloud is easy - see Moving your website.OVHcloud - sign-in/out
The Share menu now includes the option to sign into and out of your OVHCloud account, which is useful if you need to switch between different accounts.HTML Code Widget for Websites
Many websites allow their services to be integrated into your own website, typically by providing you with a small piece of HTML code that you need to add to your site. There is now a new widget that makes this process easier with websites created with Web Designer+. See Components > Print & Web Components > Other Components > General HTML Code, in Elements and in the Designs Gallery. Drag and drop this widget onto your web page, then double click to open it. A window opens into which you can paste the HTML code that you copied from the external web service (replacing the “DOUBLE CLICK TO REPLACE …” text). Then click OK and the widget should update to show a preview of your widget.


24-28 November
Page 93
Last updated February 25, 2025
Text Sizes in Multi-Variant Websites
When working with multi-variant websites it’s often useful to have different font sizes for the same text in the different variants. In Web Designer+, this is achieved by having different text style settings in each variant. For example you may have your Heading 1 text style set to 32px in the Main variant for wide screens, but only 24px in the Mobile variant where there is less space. This is achieved by first changing the text size on some Heading 1 text in one variant and then using Update Heading 1 in this variant (in the text styles drop-down menu). This ensures the text size changes only for Heading 1 text in the current variant. However, many users overlook this very powerful and useful option, so now Web Designer+ shows a prompt to guide users whenever text size changes are made. Now if you change the font size on text in a multi-variant website, a prompt appears with a number of different options to help you manage different text sizes in your site. Change the text size in all variants The size of the selected text will change in all variants, not just the variant you are working on. So it’s important you check the other variant(s), to make sure the text still fits and looks ok at the new size. Update all text in this variant only This option is useful when you want different sized text in different variants. The text style that’s applied to the selected text will be updated in the current variant only, so that all similar text with the same text style applied (Heading 2 in the above example), will be updated. But Heading 2 text in the other variant(s) will not change. Change the selected text in this variant only, by creating a new Style This is similar to the second option above, except a new style is created. This is useful where you want different sized text in different variants, but you only want to change the selected text and not other text that uses the same style.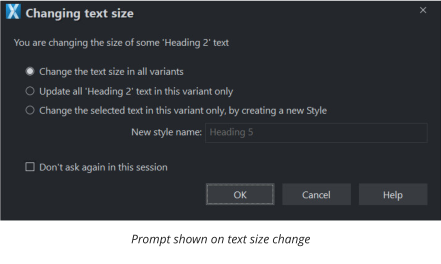
Page 94
Last updated February 25, 2025
Points to note
•
Note that it’s best not to use too many different styles or font sizes. The best designed websites use
only a few different text sizes, so decide what sizes you want and then use a different text style for
each.
•
If you don’t like the prompt and want to manage text sizes yourself, select the Don’t ask again
option and you won’t be prompted again in the current Web Designer+ session. Text sizes will change
in all variants in this case, unless you use the Update style in this variant option.
•
Text that doesn’t have any style applied (No style) does not trigger the prompt.
Modular Website Improvements
Maintaining Block Width
Normally in a Modular Website, all Web Blocks should be the same width as the page, in each variant. But if an object wider than the page was added to the Block, the Block width could exceed the page width and this could be difficult to correct. Therefore the following improvements have been made with this update. Automatic scaling on insertion into Web Block Now when a very wide object is added to a Web Block (via import, paste or dragging), its width is reduced so it fits into the Block without making the Block wider. Restrict width & position of objects in a Block It’s no longer possible to increase the width of an object beyond the width of the Block, or to move an object such that it would increase the Block width. Manually reducing Block width Where a Web Block has already become wider than the page, you can now simply select the Block and click-drag its right edge to reduce its width back to that of the page.Other Modular Website fixes
• Error removing shadow from object after removing it from a Flexible Web Block. Fixed. • Objects with feather effect can’t be dragged into Web Block. Fixed. • With a Web Block selected, Shift+click on other Blocks to add them to the selection. This is useful for deleting or copying multiple Web Blocks. • The number of objects permitted in a Flexible Web Block is now unlimited (previously the limit was 50).Other Web Improvements
• Favicon not working in web browsers, when websites or documents are set to export images as WebP or AVIF. Fixed.
Page 95
Last updated February 25, 2025
•
Max photo popup size increased from 4000px to 8000px.
•
Animated GIF placeholder images sometimes not re-generating. Fixed,
•
Page transition list incomplete (French only). Fixed.
•
WebP only supports images up to 16k pixels high or wide, so larger images are now always exported
as PNG or JPEG.
•
Attached file (such as a video or GIF) is not replaced when replacing with a file with the same name.
Fixed.
•
‘Link to page’ setting sometimes shown incorrectly in Web Properties > Link dialog. Fixed.
•
‘Link to anchor’ option sometimes doesn’t work when ‘Scale to fit’ is off. Fixed.
•
Serious error when changing the PDF file referenced by a link. Fixed.
Other Improvements
• Windows device identification sometimes inconsistent, affecting Web Designer+ activation. Fixed. • Web Designer+ would sometimes error when exporting large, poster-sized designs to web. Fixed. • Serious error on selection of text after pasting it in from another document. Fixed. • Serious error when scrolling Color Gallery with ‘full info’ turned on. Fixed.Version 24.5.1 (6 Dec 2024)
Maintenance Update
A maintenance update with some valuable fixes: • Multiple @2x being included on image filenames in web export. Fixed. • Double resolution images (Retina mode on) exported at normal resolution. Fixed. • Serious error in attribute optimization when opening some documents . Fixed.Christmas (10 Dec 2024)
Over 700 new Christmas and winter themed assets to help you make the most of the season and add a warm glow to your website, social media and print. • 120 Backgrounds in Components > Image Resources > Backgrounds > Christmas, Winter and New Year • 100 Illustrations in Components > Image Resources > Illustrations > Christmas and Winter • 303 Photo Clipart in Components > Image Resources > Photo Clipart > Christmas, Text and Winter • 148 Silhouette Graphics in Components > Print & Web Components > Silhouette > Christmas and Winter • 10 Facebook in Social media > Facebook • 10 Instagram in Social media > Instagram
Page 96
Last updated February 25, 2025
For more info about our new content check out Xaratemplates.com
One of 100 new illustrations amongst 700+ new assets
Version 24.5.2 (17 Dec 2024)
Maintenance update
A maintenance release with a couple of fixes for Modular Websites: • When pasting a copied Web Block, if a Flexible Web Block is selected it gets pasted outside the Block’s FlexGroup. Fixed. • Changing the height of a freeform Web Block changes the height of objects inside it. Fixed.Web Content (29 Jan 2025)
We’ve added 4 new business Web Templates, designed to suit various industries and make it easier to create professional-quality designs. In the Components category, we’ve also introduced 20 new Sliders, perfect for both Modular and Freeform websites. Additionally, we’ve expanded the Modular Websites / Web Blocks category with over 240 new blocks, providing even more flexibility in web design.
Page 97
Last updated February 25, 2025
•
20 Sliders in Components > Image Resources > Sliders
•
4 Modular Web Templates in Modular Websites > Website Templates > Business (with 50 new
blocks in these websites)
•
240+ New Blocks in Modular Websites > Web Block
For a preview of the new templates check out xaratemplates.com.
To enhance usability, we’ve also improved block labeling—now, blocks are outlined with a frame, making it
easier to distinguish between Flex (purple) and Freehand (green) blocks.
Valentines 2025 (6 Feb 2025)
Over 250 new graphic assets in a variety of styles to help you create that all important message on 14th February. Hope you haven‘t forgotten! • 5 Instagram in Social Media > Instagram • 5 Facebook in Social Media > Facebook • 50 bitmap Backgrounds in Components > Image Resources > Backgrounds > Valentine‘s Day • 50 bitmap Illustrations in Components > Image Resources > Illustrations > Valentine‘s Day • 50 bitmap Clipart in Components > Image Resources > Photo Clipart > Valentine‘s Day • 50 vector Silhouette in Components > Print & Web Components > Silhouette > Valentine‘s Day • 50 vector Graphics in Components > Print & Web Components > Graphics Seeking inspiration for your Valentine‘s Day message? You‘ll find help in the Designs Gallery.


Page 98
Last updated February 25, 2025
Version 24.6 (25 Feb 2025)
Modular Website Improvements
Improved Web Block Positioning
With this update improvements have been made to how Web Blocks are positioned and organized in a Modular Website. As you edit, Designer+ will make sure all your Web Blocks are always stacked one after another, with no overlaps or spaces between them. As you change the height of a Block, Blocks below it are moved accordingly to maintain the layout. Existing spaces will close If you have any existing spaces/gaps between Web Blocks when you open your project in 24.6, those spaces will be closed automatically as soon as you start making changes. So if you find that you want some space between consecutive Blocks, then you need to use one of the Spacer Blocks. You can find these in the Designs Gallery under Modular Websites > Web Blocks > Dividers & Spacers.Draw new objects directly into Blocks
Now whenever you draw a new object using the Quickshape Tool, Freehand Tool or Shape Builder it is added to the nearest Web Block and automatically shared with the other Variants of your website. If you want to draw a new object without having it added to a Block initially, draw it to the left or right of the page area. Then you can click-drag it into any Web Block when you are ready.Blank Web Block added to new pages
Now whenever you add a new blank page to a website, the new page contains an empty Web Block, into which you can add objects, and the new page’s height is set appropriately. Add a blank page with Edit > Pages > New blank page, with the right-click menu, or with the New page button in the Page & Layer Gallery.Modular Website Fixes
• Flexible Web Block margins sometimes lost on import. Fixed. • Embedded object in wrong position after dragging text with embedded object into Web Block. Fixed. • Serious error when resizing feathered objects inside a Web Block. Fixed. • Don’t allow Web Blocks to be accidentally ‘flipped’ vertically when dragging the bottom edge up above the top edge.Web Improvements
Linked file handling option
Since the 24.0 update to Designer+, files added to a project (such as linked PDFs, audio files, etc.) are saved within the project (.xar or .web) file, rather than being copied to a folder alongside the project file. Some
Page 99
Last updated February 25, 2025
users have requested the option to return to having such files saved into an external folder, so a new
option has been added to enable this. See the new Save in external folder option at the bottom of the
Utilities > Web properties > Placeholder tab.
Web fixes
• Dragging and dropping a photo filter from the Designs Gallery onto a photo sometimes fails. Fixed. • Double / shown in ‘Explore Web space’ window. Fixed. • Shape has missing line segment when web exported as SVG. Fixed. • Serious error when web previewing from widget editor. Fixed. • Umlaut characters missing from published web page. See new support page for information about how to fix this problem with your web hosting settings.Import/Export Improvements
• SVG export: Windows Explorer PowerToys preview window doesn’t show Xara SVGs. Worked around with modified SVG. • PDF import: Some text positioned incorrectly in some PDFs. Fixed. • SVG export: Windows Explorer PowerToys preview window doesn’t show Xara SVGs. Worked around with modified SVG.Other Improvements
• Arrange > Combine shapes operations don’t work when shapes have Art brush strokes. Fixed. • Reducing the selection area when using marquee select does not unselect the excluded objects. Fixed. • The templates menu shown when right-clicking on the + icon (shown to the right of your open document tabs) now includes any custom templates you’ve saved.New: Business Social Media Templates (10 March
2025)
We’ve added 40 templates and ideas to post valuable content throughout your social media calendar across Facebook, Instagram, LinkedIn, and Twitter (X).What's Included:
Growth-Focused Content
• Webinar and workshop promotions • Professional networking announcements
Page 100
Last updated February 25, 2025
•
Business partnership templates
•
Career and hiring announcements
Sales & Conversion
• Limited-time offers • Real estate listings and open houses • Product announcements • Service promotionsTrust-building and social proof
• Client testimonial layouts • Success story frameworks • Milestone celebrations • Industry expertise showcasesVersion 25.0 (01 Jul 2025)
Shape Tool Improvements
Live Path Editing
Now in the Shape Tool, editing of paths shows results ‘live’, as you drag. Previously only an outline was shown during the drag, with the shape/line being updated only on completion of the operation. You can switch back to the previous behavior, if required, by double-clicking the Live drag indicator on the status line (bottom right corner of the Designer+ window).Shape Corner Tool
The Shape Tool now includes the option to add corners of different shapes to points in a path (both lines and shapes). They can be applied to any ‘cusp’ points (those where lines join at an angle). Simply select a point of a path and choose the corner shape and radius you would like to apply, from the new corner controls on the infobar. Or you can right-click on the point and choose the corner type from the context menu. Once the corner has been added, you can drag on its selection handles to adjust its radius or position.
Page 101
Last updated February 25, 2025
The corner type control includes 4 types of corner shapes to choose from.
In the Shape Tool you can select multiple points at once, to apply or adjust corners on them together. This
way you can easily give multiple corners the same type and radius. To select multiple points, use marquee
select (click-drag a box around the points), or Shift+click to add points to the current selection.
Once you have selected multiple corner points, you can drag on any of the radius handles to adjust the
radii of all the selected points together.
The lines leading into a corner angle do not have to be straight. Corners can be applied to curves as well.
Corner radii automatically get smaller if the shape is changed such that the desired radius is not possible,
but the desired radius will be restored if subsequent editing allows. The infobar always shows the desired
radius you’ve set - not the actual radius. Applying Arrange > Convert to Editable Shapes will commit or
“bake in” the corner shapes to make an editable shape. Shapes and lines with corners can be used
everywhere that normal shapes or lines can be used.


Page 102
Last updated February 25, 2025
QR Code Generator
Designer+ now has its own QR Code generator, which can be used instead of the 3rd party QR Code widgets available in Elements. Insert > QR Code > QR Code, opens the new QR Code editor. Enter your text or link URL, then press OK to instantly create your QR Code. Note that the QR Code is created as a vector graphic, so you can change its color to anything you like after creation.Error Correction Level
With this option you can reduce the error correction level from its recommended default value of High. A high correction level means your QR Code will contain more ‘data pixels’ (the small squares that make up the code), which means the code is more likely to remain readable even if it gets damaged or if parts of it are lost or obscured. A lower correction level gives you a smaller QR Code image with fewer data pixels, but

Scan Me
Page 103
Last updated February 25, 2025
which is more likely to become unreadable if damaged/obscured.
The choice is yours depending on the conditions in which your code is going to be used and how much
space you have for the code on your document. The code size shows you how many data pixels your code
will have with the current settings.
Custom data pixel shapes
By default each data pixel in the QR Code is a square, but you can use almost any shape you like. Draw a shape and with it selected, Insert > QR Code > QR Code. In the QR Code editor you should see that the Use selected object as data pixel shape option is enabled and so you can turn it on. When you create the code, it should use the shape you selected for each data pixel. Avoid using very complex shapes or shapes with holes in to ensure your code is easily readable by scanners.Editing QR Codes
To change a QR Code you’ve already inserted into your document, click on it with the Selector Tool. This reveals a small context menu with an Edit option on it, which re-opens the QR Code editor window.Pre-designed QR Codes
Elements includes a selection of different QR Code designs under Components > Print & Web Components > QR Codes. The previously available 3rd party QR Code widgets are also now in this folder. To jump directly to this folder in Elements or in the Designs Gallery, use Insert > QR Code > More QR Codes… You can see a few of the available designs at the top of this section about QR Codes. Some of the QR Code designs have a logo or symbol in the center. To replace the logo/symbol, go into the Selector Tool and right-click on the logo/symbol. Then choose the Replace option from the context menu.
Page 104
Last updated February 25, 2025
Web Improvements
New Document Viewer Design
The web viewer for presenting documents and presentations in a web browser has been updated. The bottom bar shown in the screenshot below appears whenever the mouse pointer is moved, or on touch. By default no logo is shown in the bottom bar, but this can be set to any logo in the Utilities > Web Properties > Export tab. Viewers can click on the page numbers in the bottom bar to switch to a ‘page thumbnails’ view, which shows clickable images of each page, so you can jump directly to any page.Web Properties > Meta tab
There’s now a new Meta tab in the Utilities > Web Properties dialog. The website meta data fields Title, Description and Keywords have been moved to this new tab from the Website tab where they were before. Upload Favicon File A favicon is the icon that appears in a web browser’s tabs, to help visually distinguish between different
Page 105
Last updated February 25, 2025
open tabs. Designer+ has always had support for these, but it requires an object in the project to be tagged
with the special name favicon. The tagged object is then used to create the favicon image for the browser.
Now you can optionally upload a favicon file directly instead, using the new option in the Meta tab.
Embedded File Handling
Large files When embedding large files (50MB+) in a project, the user is now asked if they would like to switch to saving the file in an external folder instead of having the file embedded in the project file. This prevents the project file getting unnecessarily large. Switching to external folder Whenever the option is changed to save into an external folder, any files currently embedded in the project file are automatically moved out into the folder. The setting for this is in the Utilities > Web Properties > Placeholder tab. Replacing Files Now you can right-click on any object that has a file attachment and you should see a Replace option in the context menu. This allows you to replace any attached file with a new version of the file, or with a different file. If the file being replaced has other links to it elsewhere in the document and you choose a file with a different name as the replacement, you are now asked if you want to replace all references (which will delete the old file from your project), or replace the file only for the selected object. Document Info File > Document info now shows details of any files embedded in the current project.Other Web Improvements & Fixes
• Bookflip effect now shows the first page on its own (like a book’s cover page), before showing subsequent pages in pairs. Similarly if there are an even number of pages, the last page appears on its own. • Stick-at-top Navigation bar scrolls to incorrect position in website. Fixed. • W3C validation checker errors on some exported websites. Fixed. • Dreamhost publishing: error creating folders in web space. Fixed. • Drag and drop Navigation bar replacement not working in Modular websites. Fixed. • Google page speed test not recognizing viewport tag in mobile variant. Fixed. • Gap sometimes introduced in Web Block background after height adjustment. Fixed. • Empty space at bottom page after adjusting Web Block height. Fixed. • Image Slider with animated GIF not working as expected. Fixed. • Popup photos can cause unnecessary scroll when opened on some Mobile devices. Fixed.
Page 106
Last updated February 25, 2025
•
Full stop in page name caused website page to export incorrectly. Fixed.
•
Button with centered text can shift vertically on mouse-over. Fixed.